
Timelapse videos are basically sped up videos, focused on specific object or scenery for the duration of the video. Most typical timelapse videos show a scenery, from dawn until dusk.
For the purpose of this guide, we went through tons of various timelapse apps and eventually found the best suited for our purposes: Open Camera app for Android. It is fully free, open source app that doesn't have any ads or doesn't try to make you buy more features. Furthermore, it allows full control of video quality, speed of the timelapse video and more.
Sure, many phones ship with manufacturer's own camera app that might have some kind of timelapse feature built-in. However, we feel that Open Camera provides much more flexibility than most stock apps we've seen so far.
- What is needed for creating a timelapse video?
- Open Cameran settings
- Video mode and video settings
- Let's do it!
- Finally, finished video!
What is needed for creating a timelapse video?
In order to make great timelapse videos, some peripherals are required.
Spare Android phone
Obviously, we'll need an Android phone (or tablet) for this project. Best option would be a phone that is not used anymore: dig through your drawers and see if you can find your previous phone somewhere.
Sure, you can use your current phone, too, but in order to make timelapse videos, the phone can't be used for anything else when we're shooting the video. So, better to use a phone that is spare rather than your "main" phone.
Also, it is a good idea to have a spare charger available for the phone. Especially if you're about to create a very long timelapse video - or in case your spare phone's battery is in very bad shape.
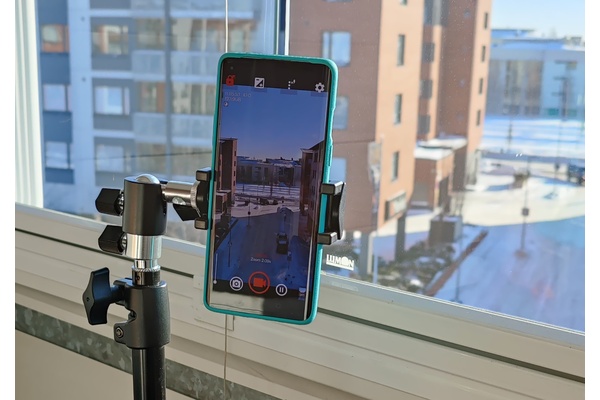
Phone stand / tripod
In order to create a timelapse video, the phone must be kept in same place for long time. Easiest way to solve this problem is to use a phone tripod, like those made by Joby. Cheap ones that have attachment for a phone cost typically something like 20 euros / 20 dollars, so this is not a deal-breaker, really.
Sure, you can make some kind of a DIY structure, too, to keep your phone in place during the recording session.
Storage space
Obviously, your phone needs to have free storage space available for the video. Luckily, the timelapse videos don't take huge amounts of storage space: in our tests, 2min FullHD video with excellent quality took about 200 to 300 megabytes of storage space.
If your phone has memory card slot, you can use that, as Open Camera app supports memory cards, too.
The app
Open Camera can be found from Google Play store, so simply download it from there and install it on your phone.
Open Camera settings
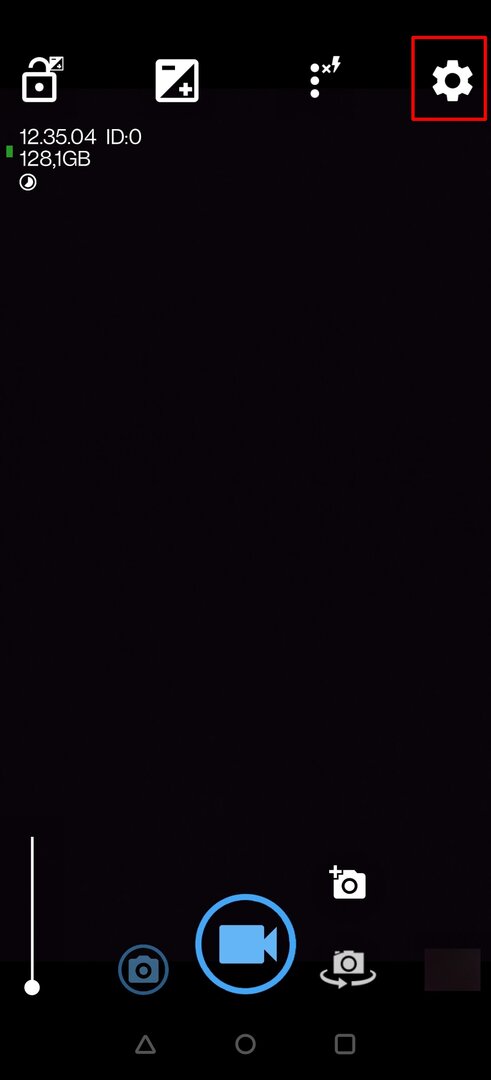
Tap the gear symbol on top-right corner of the Open Camera app in order to access the settings.
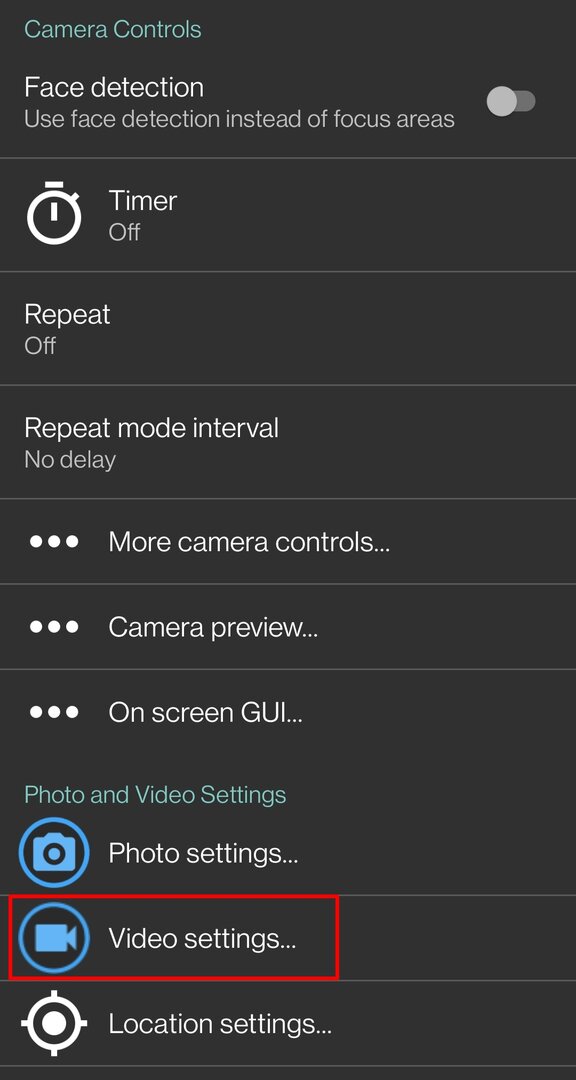
In Settings screen, navigate to Video settings.
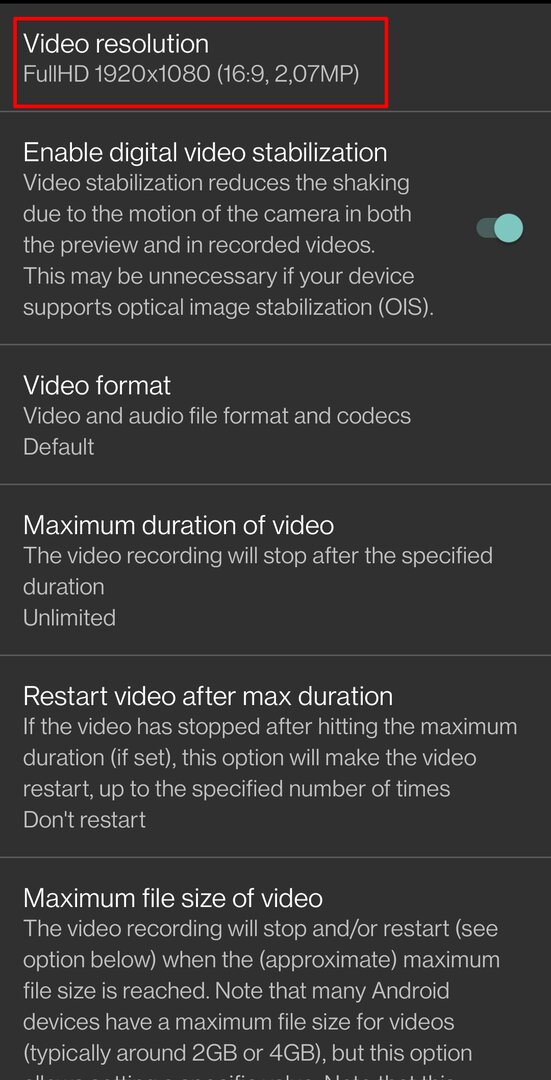
In Video settings screen, adjust the Video resolution to your preferred resolution. We opted to use FullHD / 1920x1080 resolution in our tests.
Note: The options available depend fully on your phone's capabilities!
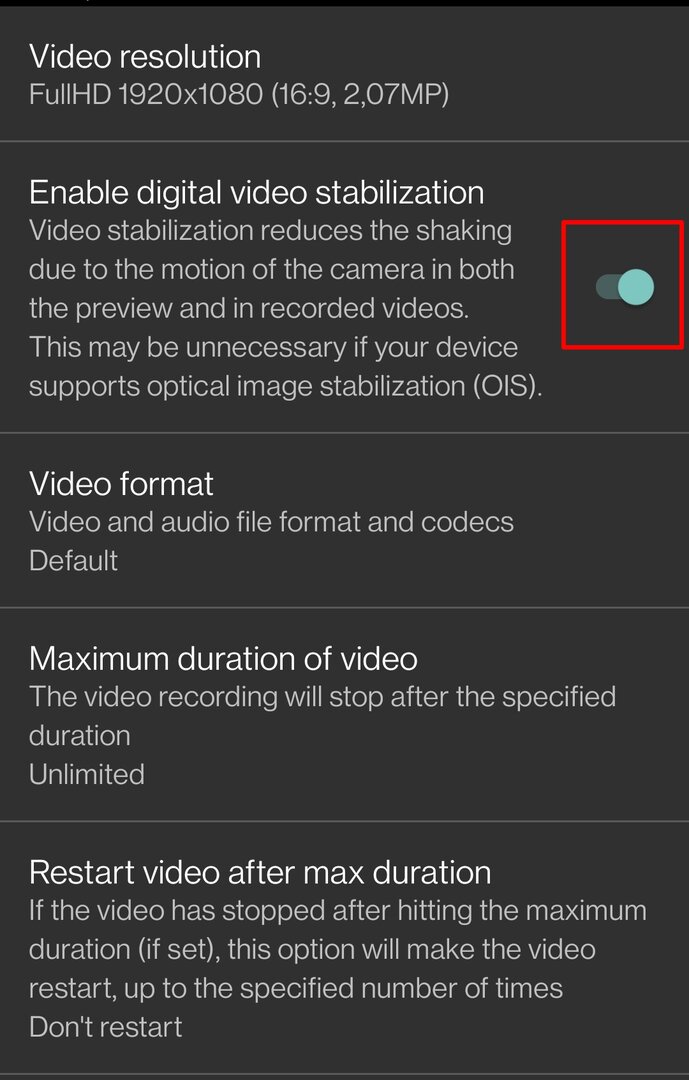
We strongly recommend that you switch the Enable digital video stabilization setting on, as it will reduce the shakiness of the video. This is very important, especially if you're not using a tripod or are shooting the video in windy area.
Other options should be left in their default settings.
Video shooting mode and settings
As you return back to the Open Camera's main screen, tap the camcorder symbol visible at the bottom of the screen in order to change the Open Camera mode from photo to camcorder mode.
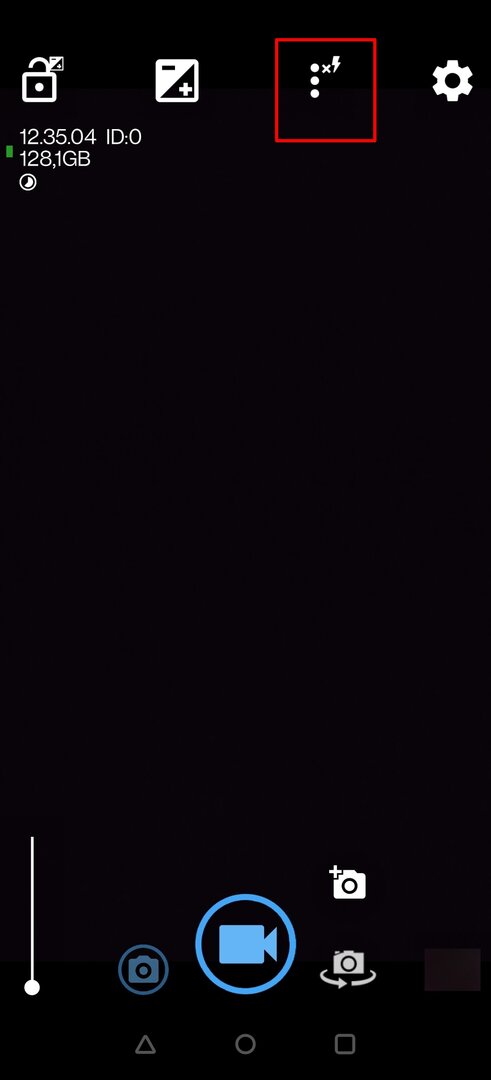
Now, tap the three-dot symbol shown at the top of the screen in order to access the camcorder settings.
Video speed and how it will affect the result
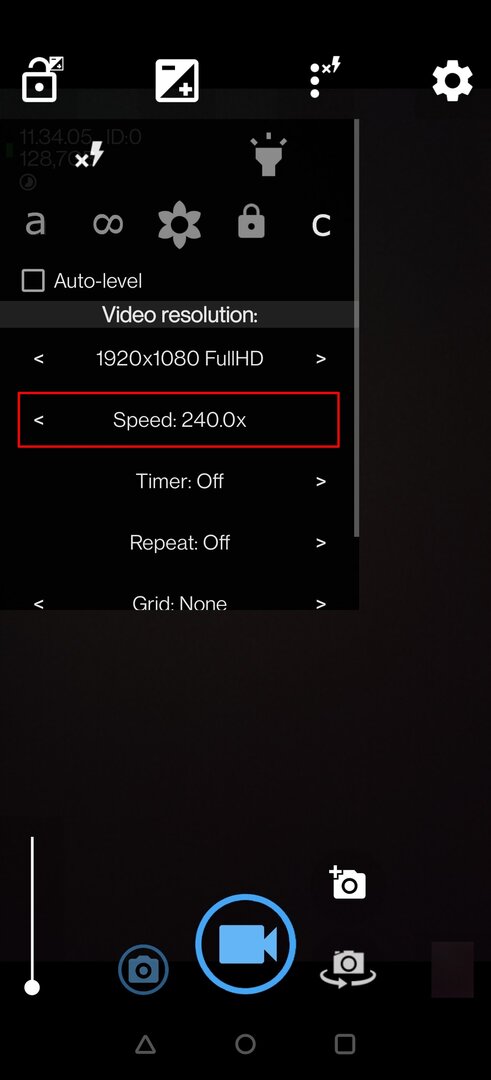
In this menu, the only thing that is important for us is the Speed setting. This setting determines how long the timelapse video will be and how much "real life time" can be squeezed into one minute worth of timelapse video.
Here's what it means:
5x speed = one hour recording will play in 12 minutes.
10x speed = one hour recording will play in 6 minutes.
120x speed = one hour recording will play in 30 seconds.
240x speed = one hour recording will play in 15 seconds.
120x and 240x mode are the best ones if you're planning to record a really, really long timelapse video. With 240x speed, an entire day (24 hours) is squeezed into a 6 min video.
Let's record!
Use the tripod to to adjust the phone's camera. Check with Open Camera's viewfinder that you're satisfied with the position of the phone and ensure that tripod is on solid ground, wont shake and wont stumble down.
If you plan to make a really long timelapse video, plug your phone to a charger right now - trying to connect charger to your phone later will inevitably cause video to shake while you're doing it.

Now, tap the top-left corner padlock symbol in order to lock the exposure. This will keep the exposure identical throughout the entire video.
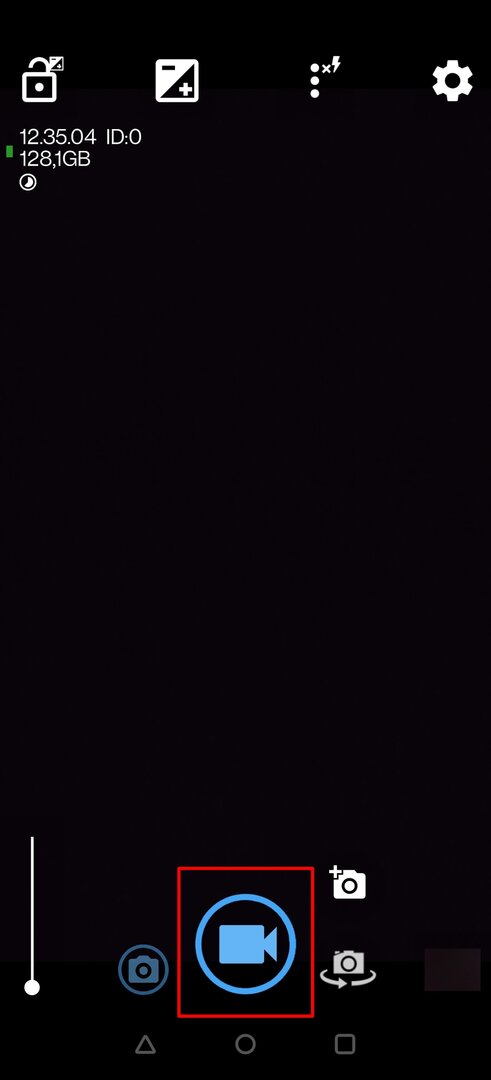
Once everything is set, tap the camcorder symbol at the bottom of the screen so that it turns red. Now, Open Camera is recording your timelapse video.
We strongly recommend that you test the project first with shorter video - say, 15 minutes - so you know what to adjust, if needed, before making longer timelapse videos.
Tips
Unfortunately, Android wont let video recording to happen when screen is turned off, so the screen has to stay on through the entire video recording session. And as we all know, screen consumes tons of battery life: it is wise to adjust your screen as dim as possible once you start recording, in order to save battery.
Also, if you're using a spare phone, turn off WiFi and location services in order to save battery.
Finally
Once you want to end your recording, simply tap the red camcorder symbol once and recording will stop automatically.
short timelapse video, shot with Open Camera, using 30x speed
Now, the recorded timelapse video is stored in your phone. You can share it directly from your phone to other people or to social media - or you can simply transfer it to your computer, if you wish to.
If you have any questions or ideas related to this guide, feel free to post them to our discussion forums.
Written by: Petteri Pyyny @ 9 Mar 2021 9:00