
TPM provides for hardware level support for a range of security and digital management services. It can be used for DRM systems to protect content, to protect digital licensing, to enhance security of full disk encryption solutions like Bitlocker (Windows) or dm-crypt (Linux), and more.
To run Windows 11, you will require at least TPM 1.2. Unfortunately, if you have TPM 1.2 you will be running Windows 11 in an unsupported state, which could mean missing out on some updates for compatibility reasons. Therefore, TPM 2.0 is recommended for a Windows 11 upgrade and should make the process a lot easier. If you do not have TPM hardware then you will be unable to run Windows 11 on your system at all, according to Microsoft.
There are other requirements for Windows 11 (EFI Secure Boot, GPT etc.) as well, but this short article is just about checking to see if TPM is Enabled, or if it is present, and what version of TPM it is.
How to check TPM status in Windows 10?
The simplest way to check on the status of TPM in Windows 10 is to check the Security processor details in Windows settings. To get there just do follow these simple steps.
NOTE: Click / Tap the cropped images before to load the full sized image if necessary.
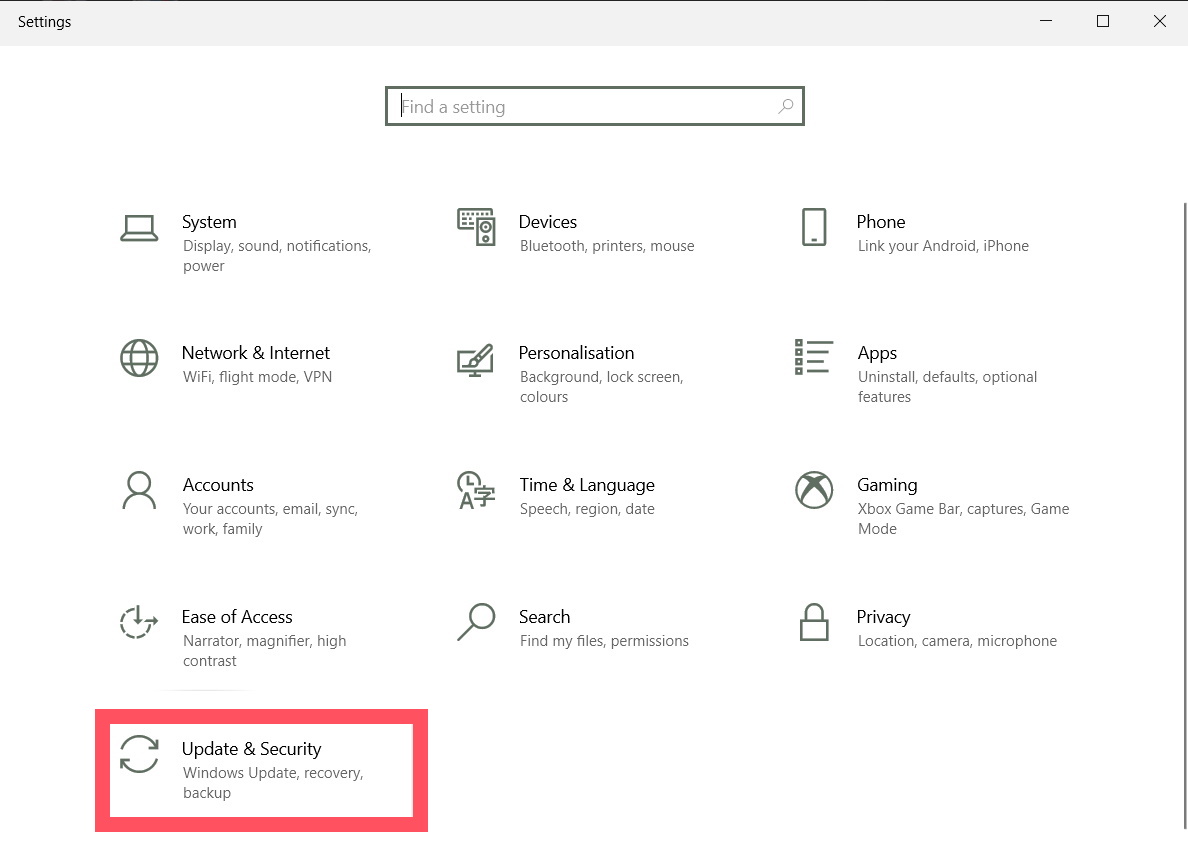
| 1. Open Settings | 2. Open Update & Security |
 |
|
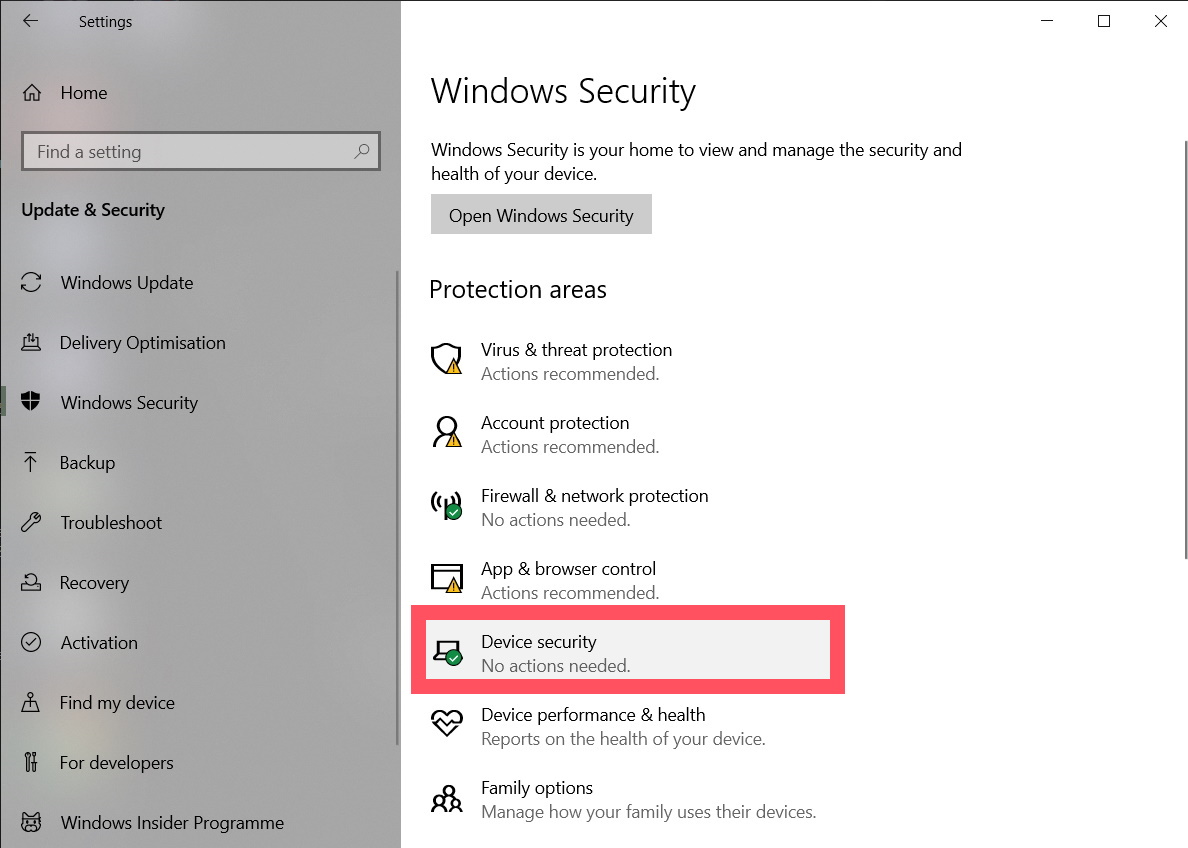
| 3. Open Windows Security | 4. Open Device Security |
 |  |
| 5. Security Processor Details | 6. Specification Version |
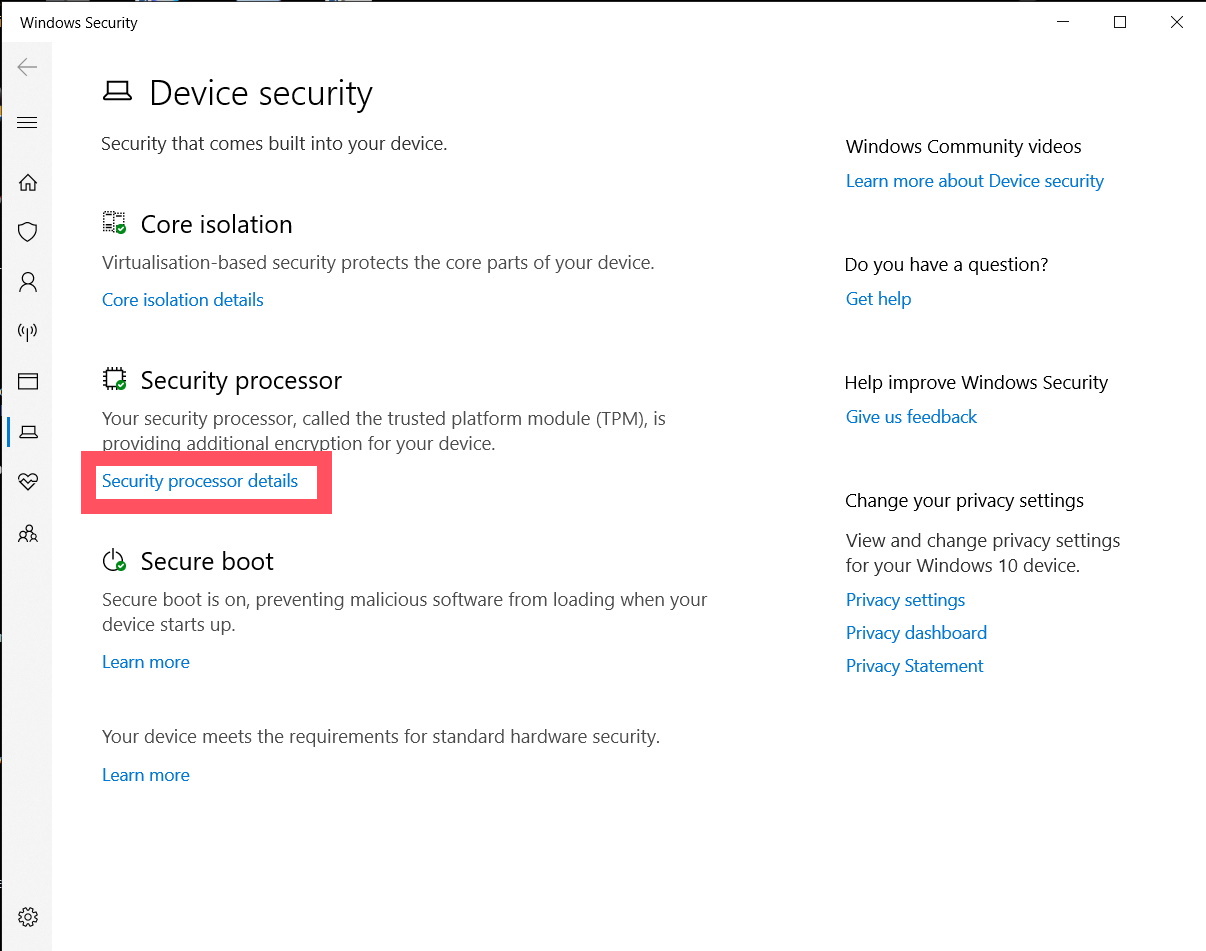 | 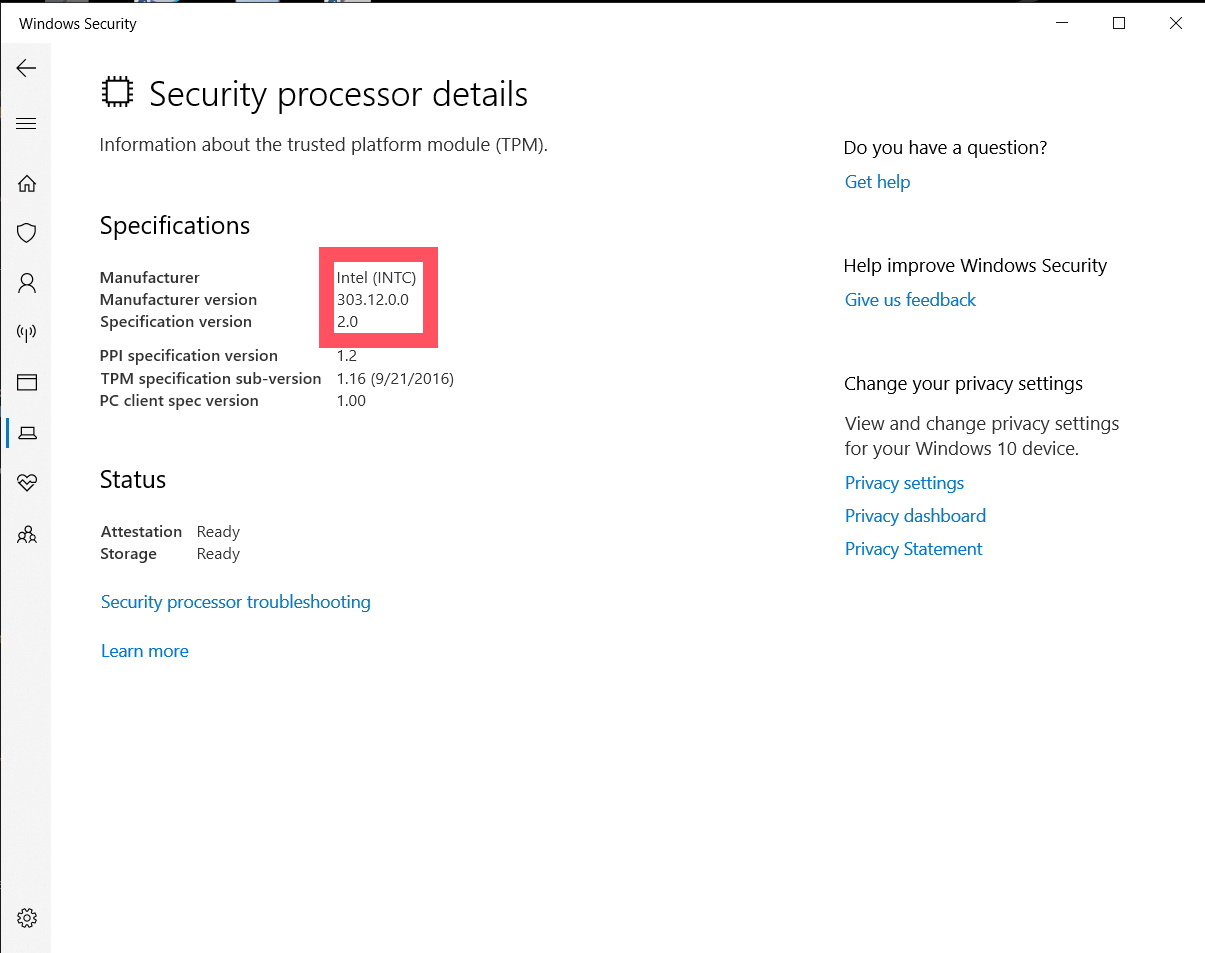 |
As above, Open the Start Menu in Windows and open Settings. From the options, scroll down to Update & Security. On the left-hand side, open Windows Security. Next on the right hand side, open Device security. A new Device security window will open, and in the middle there will be a clickable Security processor details link to click.

Here you will see the specifications about the TPM present on the system. The specification version may be 1.2 or 2.0.
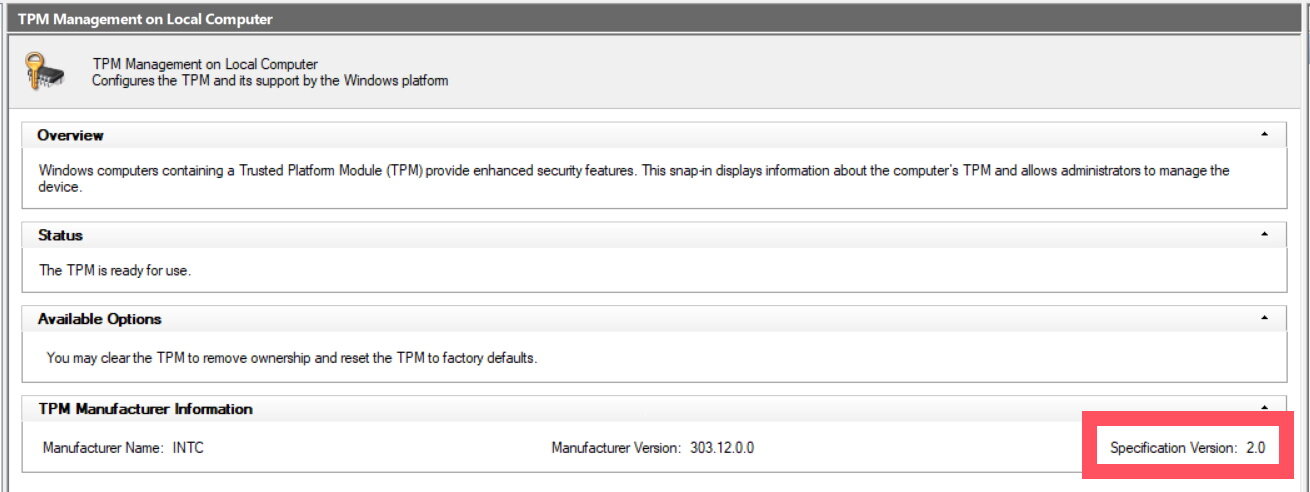
Another way to look at more information on your TPM status, you can press the Windows key + R. From the prompt, type in tpm.msc and hit enter. This will bring up more information on TPM if it is present, and will inform you if it cannot be detected.
What if TPM is not detected?
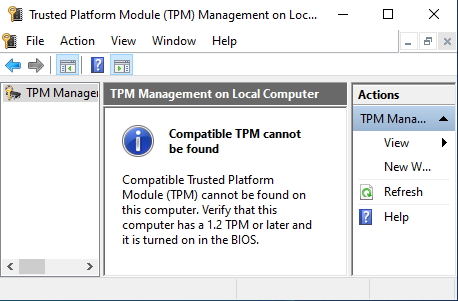
You may not have TPM hardware on your motherboard if it is not detected. However, if your motherboard or laptop was only manufactured in the past half-decade or so, then it could be a case of TPM being disabled in the system EFI/BIOS.
Check BIOS for TPM options
How to enable TPM on a motherboard of a PC, or a laptop, depends on the manufacturer. As an example of how to enable TPM if it is available (or possibly how to change settings so that TPM 2.0 spec is met), here is the process for an Lenovo ThinkPad laptop that went on sale in 2016.
The BIOS/EFI settings could be accessed by tapping ENTER when the Lenovo logo was visible. Please remember this will change based on the motherboard or laptop so you will have to Google your specific laptop, or motherboard manufacturer.
Once in the BIOS settings, here is what I saw.

As we can see this is a UEFI BIOS which is also a requirement for Windows 11. Some laptops can run UEFI but run in a Legacy boot setup which is also not supported. Another notable thing on this screen is that Secure Boot is also ON, another requirement for Windows 11. We will look at what that means in another guide.
Again, your EFI/BIOS may look completely different to this interface. In any case, we can see a Security tab so that's likely where we need to go.
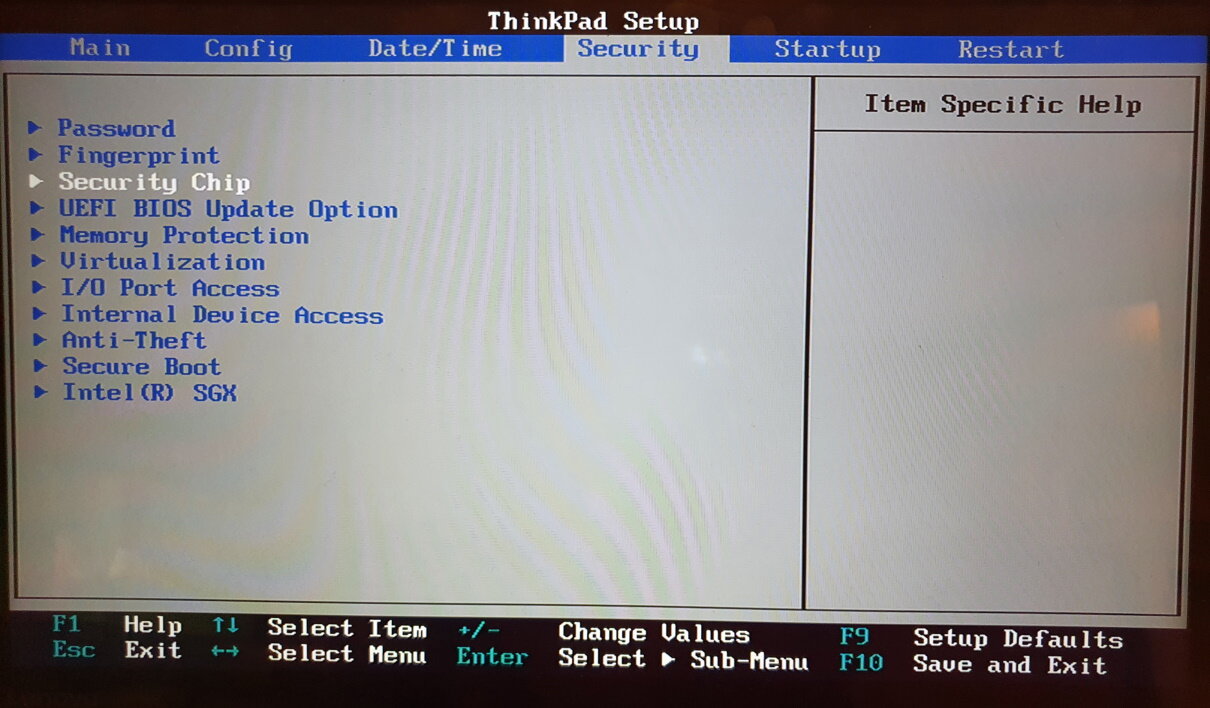
In here there are all kinds of important settings for this laptop's security. We can see Secure Boot, Anti-Theft, Virtualization, and more. However, the one I'm most interested in is the Security Chip option because that's undoubtedly where the TPM option will be.
Let's take a peek
Clearly, the option is here, and there is more than one. We will get to that in one second, but notice how Security Chip can be ENABLED or DISABLED. If you have found an option like this and it is DISABLED, you will need it ENABLED for Windows 11.
If you see it there but blanked out, it could be because other settings need to be changed. Your motherboard or laptop may be in LEGACY BOOT mode, acting like an older BIOS. This would need to be changed for Windows 11 too, but it is not entirely straightforward and a subject for another guide.
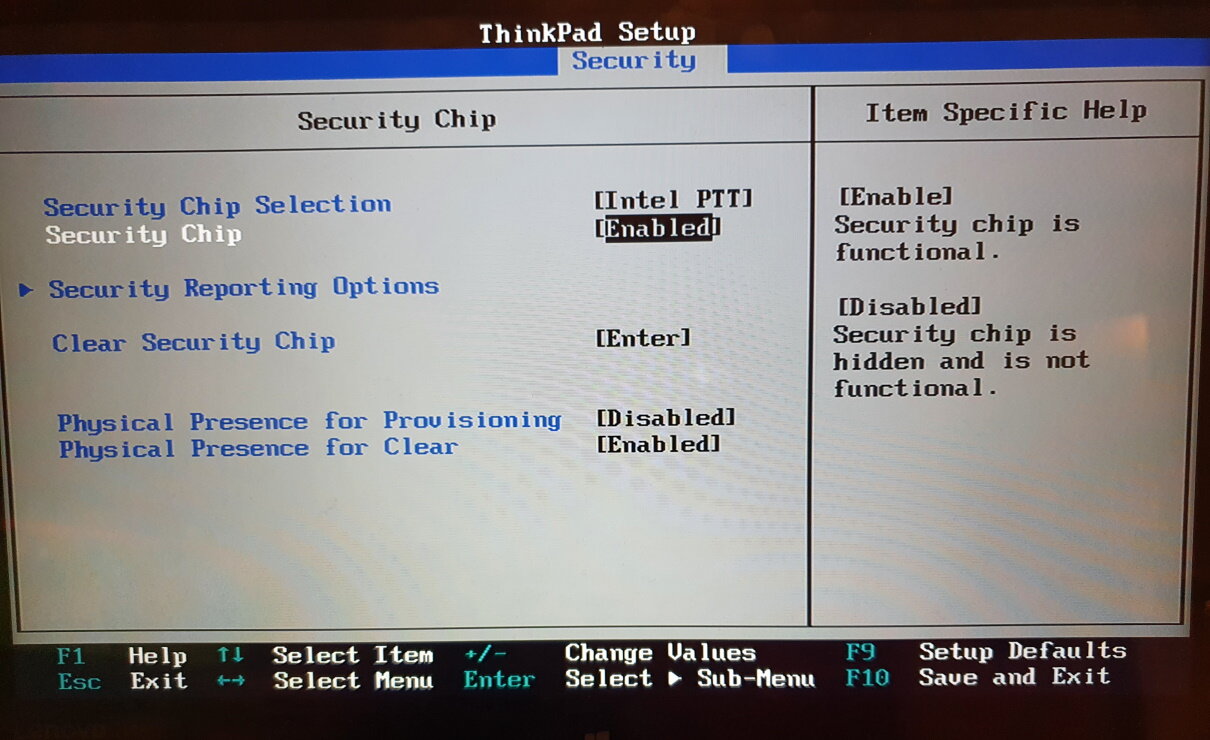
Just to show another interesting tidbit, this laptop had two options under Security Chip Selection. If I select this option, it provides information.

As we can see, there are two options for the security chip. Basically, with Intel PTT selected, TPM 2.0 is active, whereas if we choose Discrete TPM then it drops to TPM 1.2. This is possible on other systems too.
Other information on TPM compatibility and enabling it
Information for ASUS motherboards:
https://www.asus.com/support/FAQ/1046215/
Information for MSI motherboards:
https://www.msi.com/blog/How-to-Enable-TPM-on-MSI-Motherboards-Featuring-TPM-2-0
Information for GIGABYTE motherboards:
https://www.gigabyte.com/Press/News/1925
Information for BIOSTAR motherboards:
https://www.biostar.com.tw/app/en/news/news.php?S_ID=468
Information for ASRock motherboards:
https://www.asrock.com/news/index.us.asp?iD=4696
Information for EVGA motherboards:
https://www.evga.com/support/faq/faqdetails.aspx?faqid=59812
Information for Dell systems:
https://www.dell.com/support/kbdoc/en-ie/000141408/activating-the-trusted-platform-module-security-feature
Consult the documentation you received with your hardware or use Google to find specific instructions for it if this Guide hasn't been helpful. Hopefully you will get your answer quickly and it will be a good one.
Good luck!
Written by: James Delahunty @ 2 Sep 2021 6:46