
| Access Xbox 360 HDD in Windows & Backup | Viewing Page 1 -- Go To |
Access Xbox 360 HDD in Windows & Backup
 This article shows how to access the filesystem on an Xbox 360 hard disk drive. You can do this to access save games, add game updates and console updates or you might want to backup the data on your drive. You might also want to transfer data from the drive to get a bit more space temporarily. Whatever your reasons, this guide shows how to disassemble and access the Xbox 360 HDD filesystem in windows.
| Follow the Guide Author on Twitter: jamesdela@twitter |
Introduction & Requirements
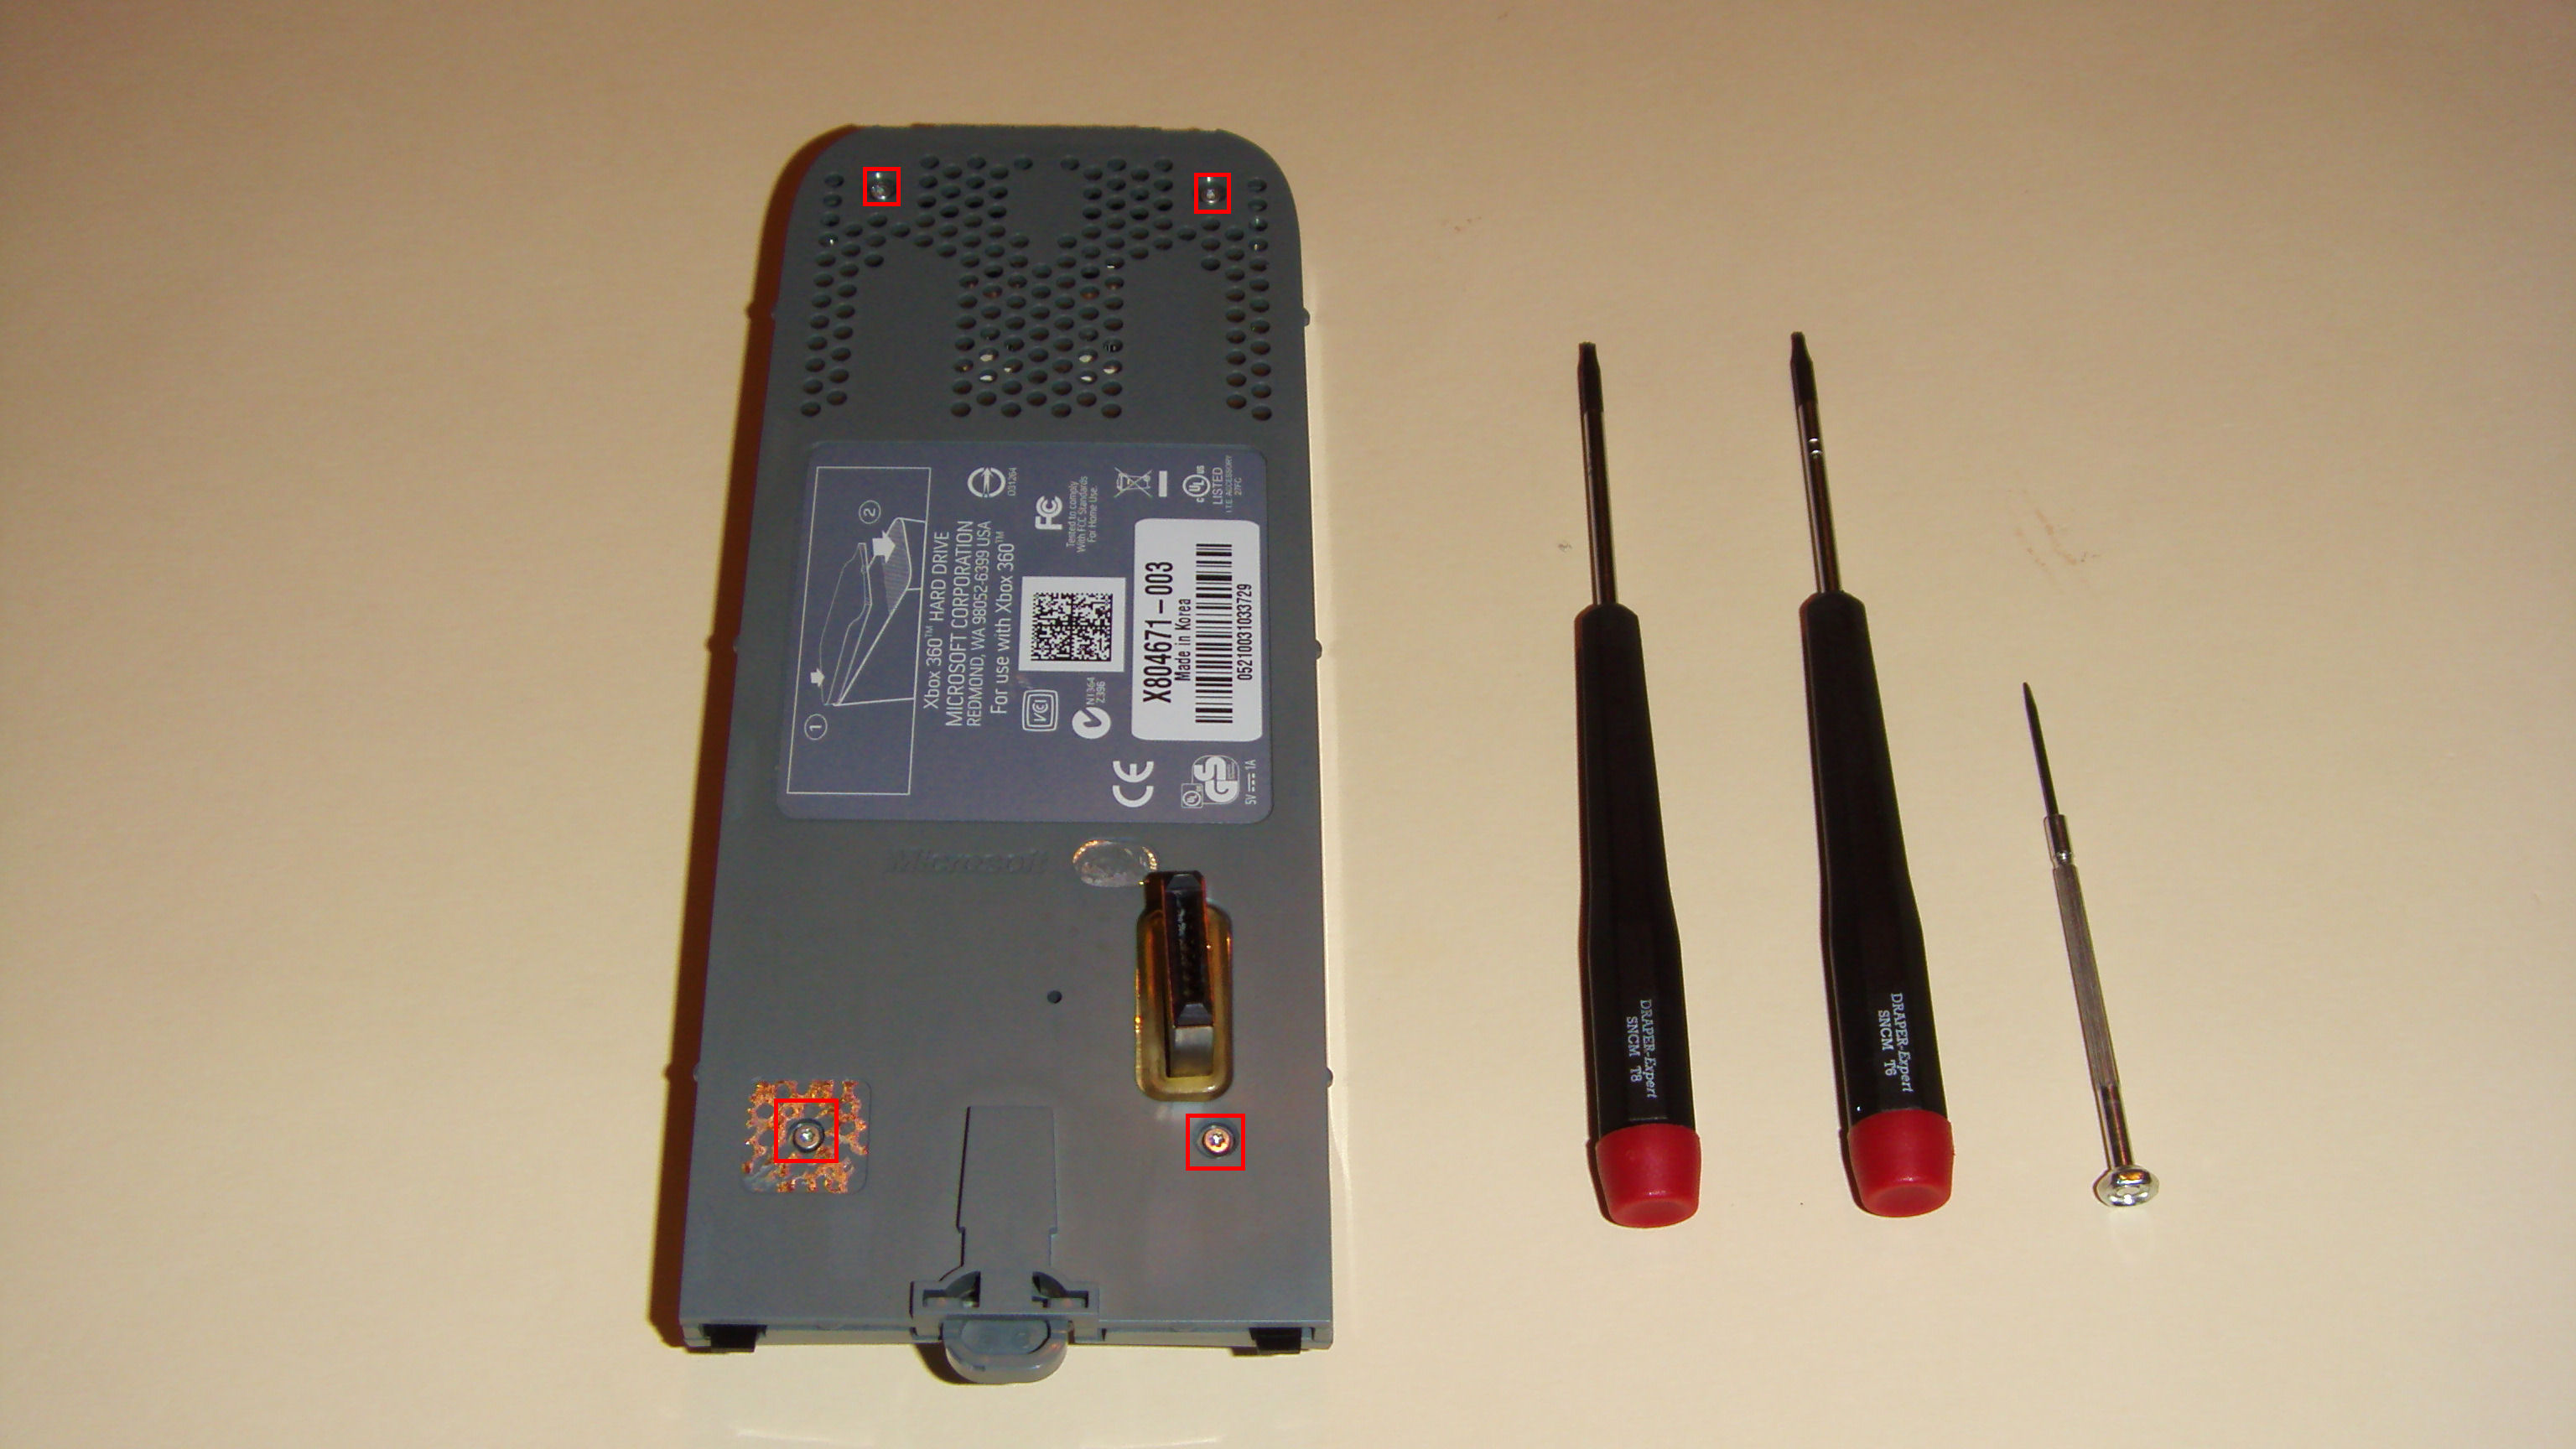
Figure 1: Xbox 360 HDD Adapter, T6, T8 and cheap flat-head screwdriver
In order to disassemble the Xbox 360 HDD Adapter , I used a T6 screwdriver and a T8 screwdriver. Other guides will claim different sizes such as T8 and T10, so make sure to test similar sized Torx screwdrivers from your set. Figure 1 shows the location of 4 screwdrivers you must remove, one which will be covered by a microsoft sticker you will need to scrape off with the flat-heat screwdriver.
You will also need to find and download a program called Xplorer360 (try Google) which will be used to access the HDD once you have connected it to your computer. Obviously you will need to have SATA ports on your motherboard (or an SATA card such as a VIA card), an SATA cable and a power supply unit that can power SATA drives. All of this should be available in any relatively new PC.
Remove 4 Inner Screws & Remove Metallic Shell
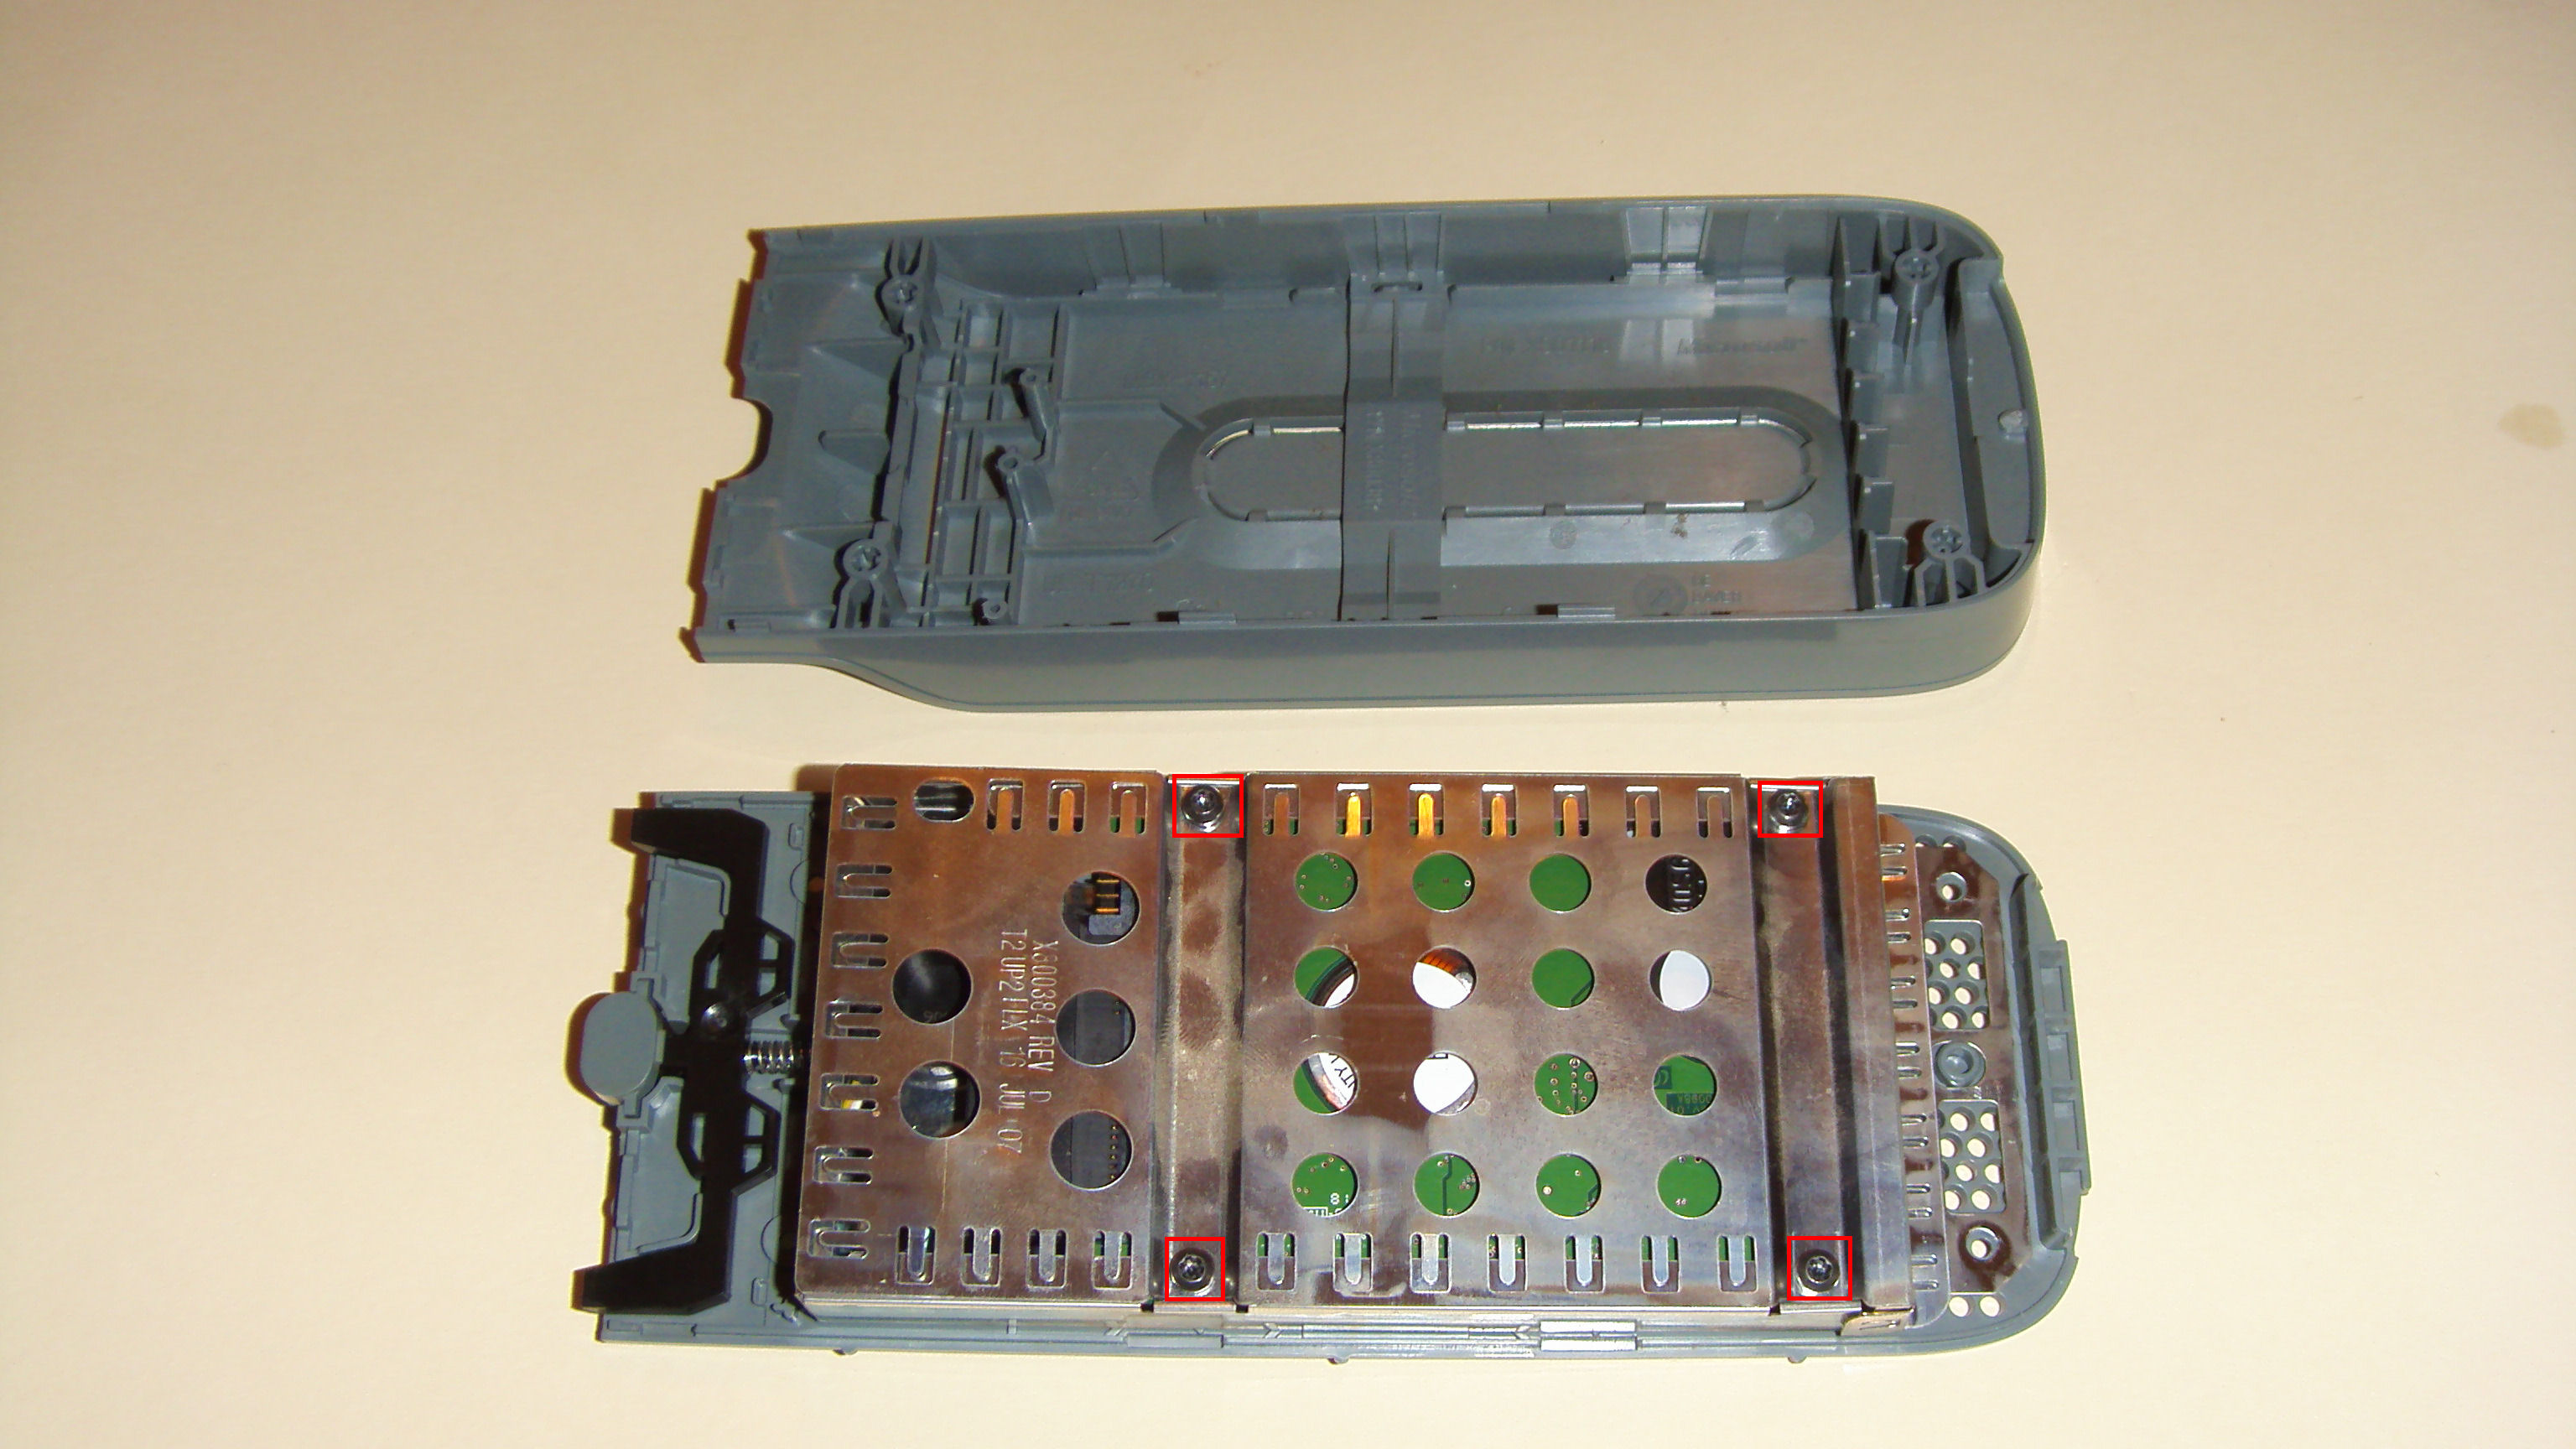
Figure 2: Four Inner Screws are marked in Red

Figure 3: Remove Metallic Cover
I used a T8 screwdriver to remove the 4 screws marked in Figure 2. Once the screws are removed, the metallic cover just pops off easily as shown in Figure 3. NOTE: Just as a note for re-assembly - the SATA adapter that is connected to the HDD itself as shown in Figure 3 , can rest on top of the other black plastic inside the case, as it can be hard to re-assemble without knowing this.
Be careful with Spring
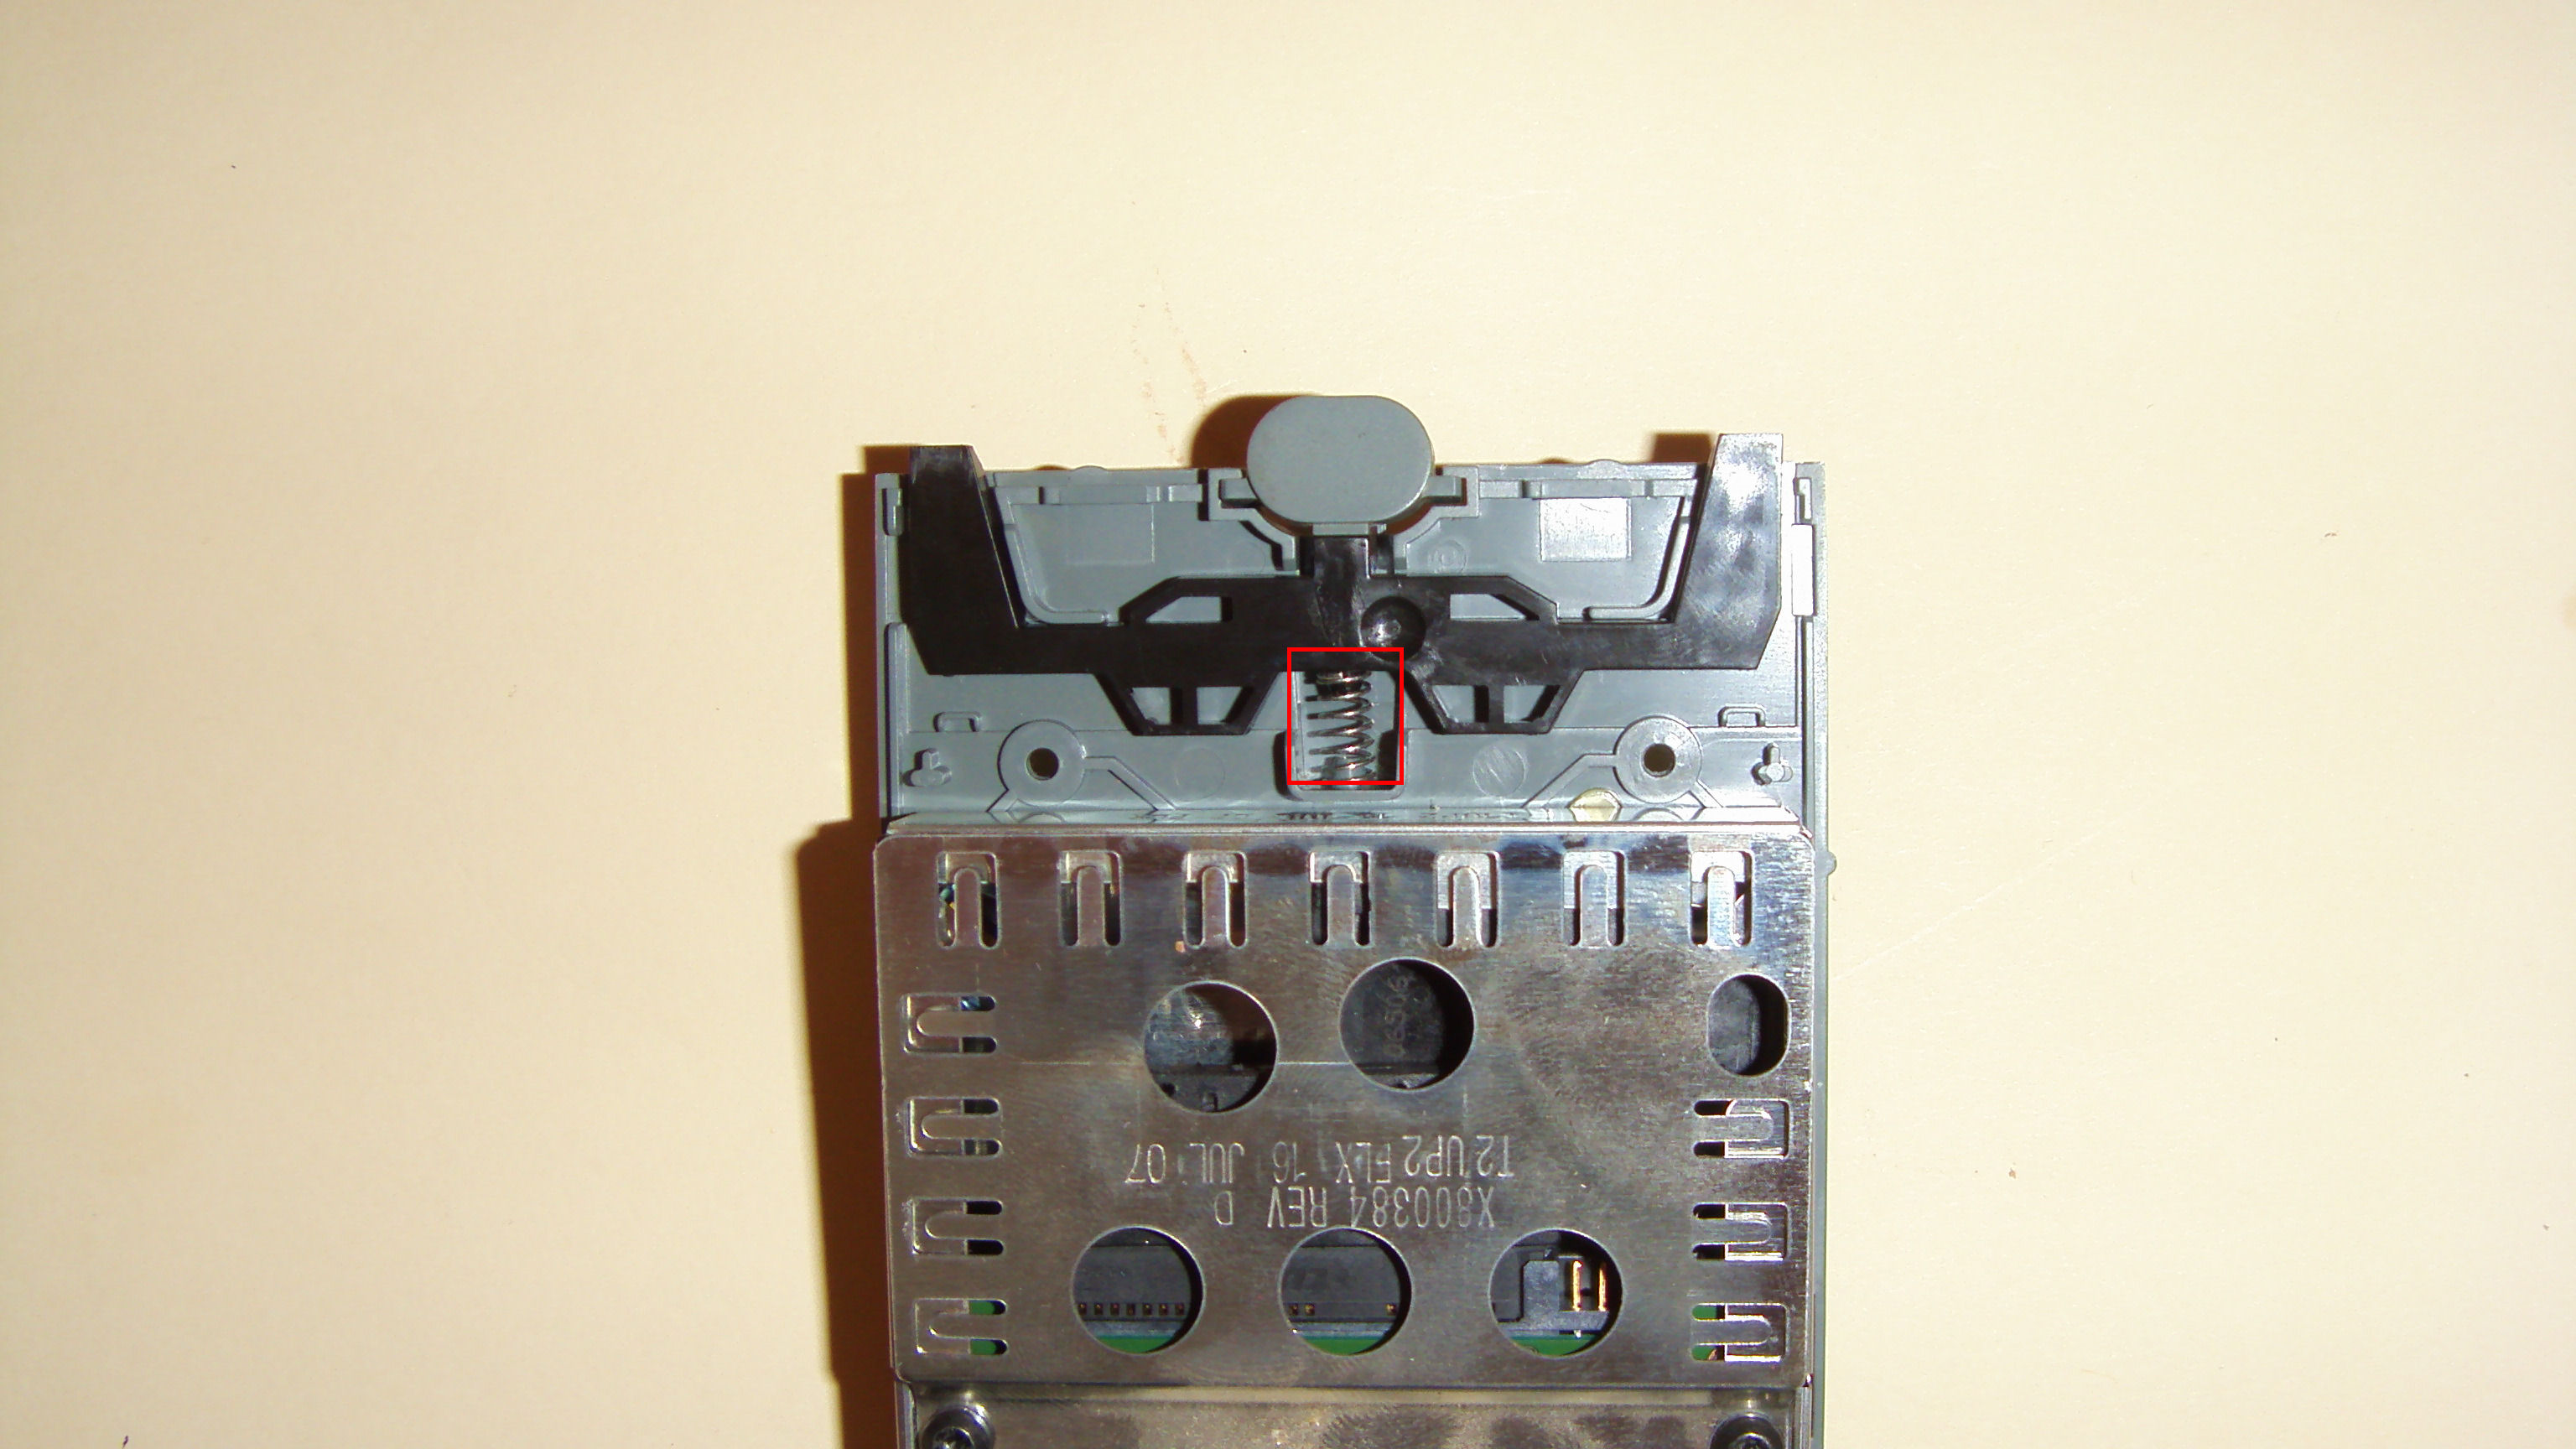
Figure 4: Do NOT lose this Spring
Please pay close attention to the button apparatus on the HDD Adapter, particularly the Spring highlighted in RED in Figure 4. If you should lose this spring, then the HDD will not clip onto the case properly and will be easily removed without pressing down on the release button, which can be a problem. Remember that if the button apparatus falls apart (it most likely will), you can click on Figure 4 to enlarge it to show you how it should look.
Remove HDD from Adapter

Figure 5: Elevate metallic tray with flat-heat screwdriver and slide out HDD
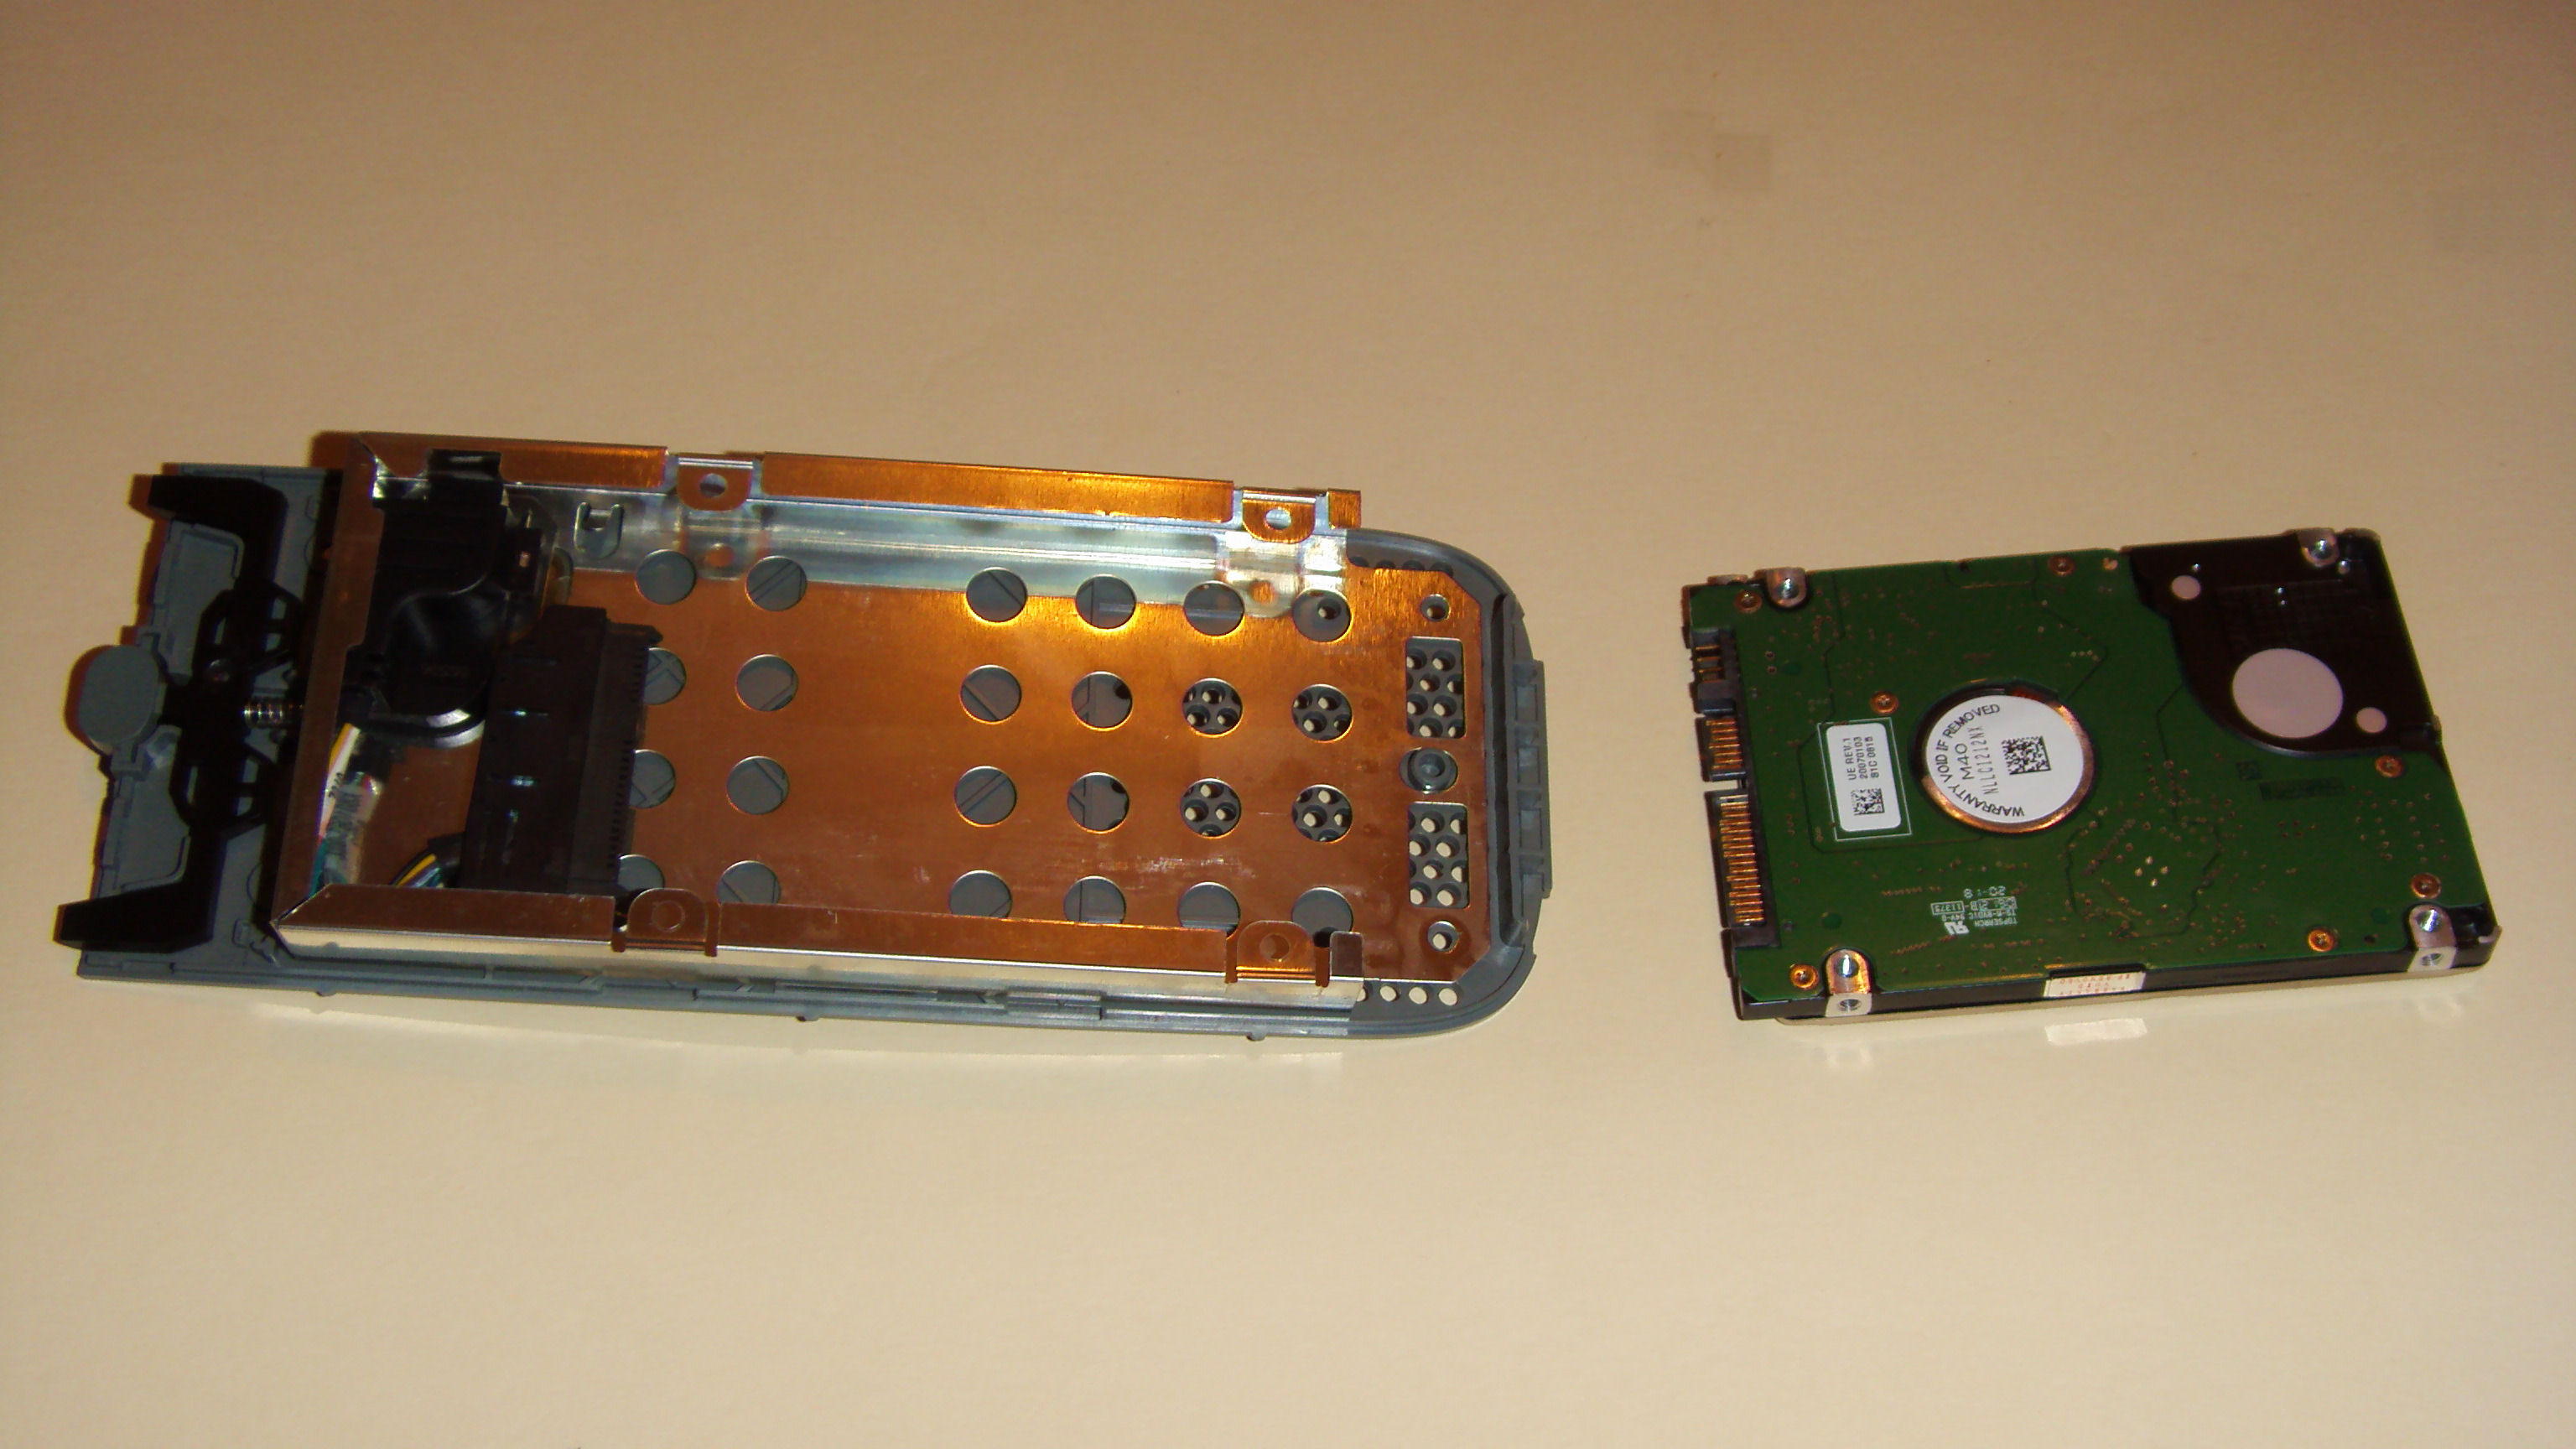
Figure 6: Shows SATA 2.5" HDD removed from Adapter
Figure 5 shows how you can remove the HDD from the Adapter by slightly elevating the metal plate it rests on so that the HDD can slide out easily after you disconnect it from the SATA cable. Figure 6 shows the HDD (right) removed from the Adapter (left). It is now ready to be connected to your computer.
Connect HDD to PC
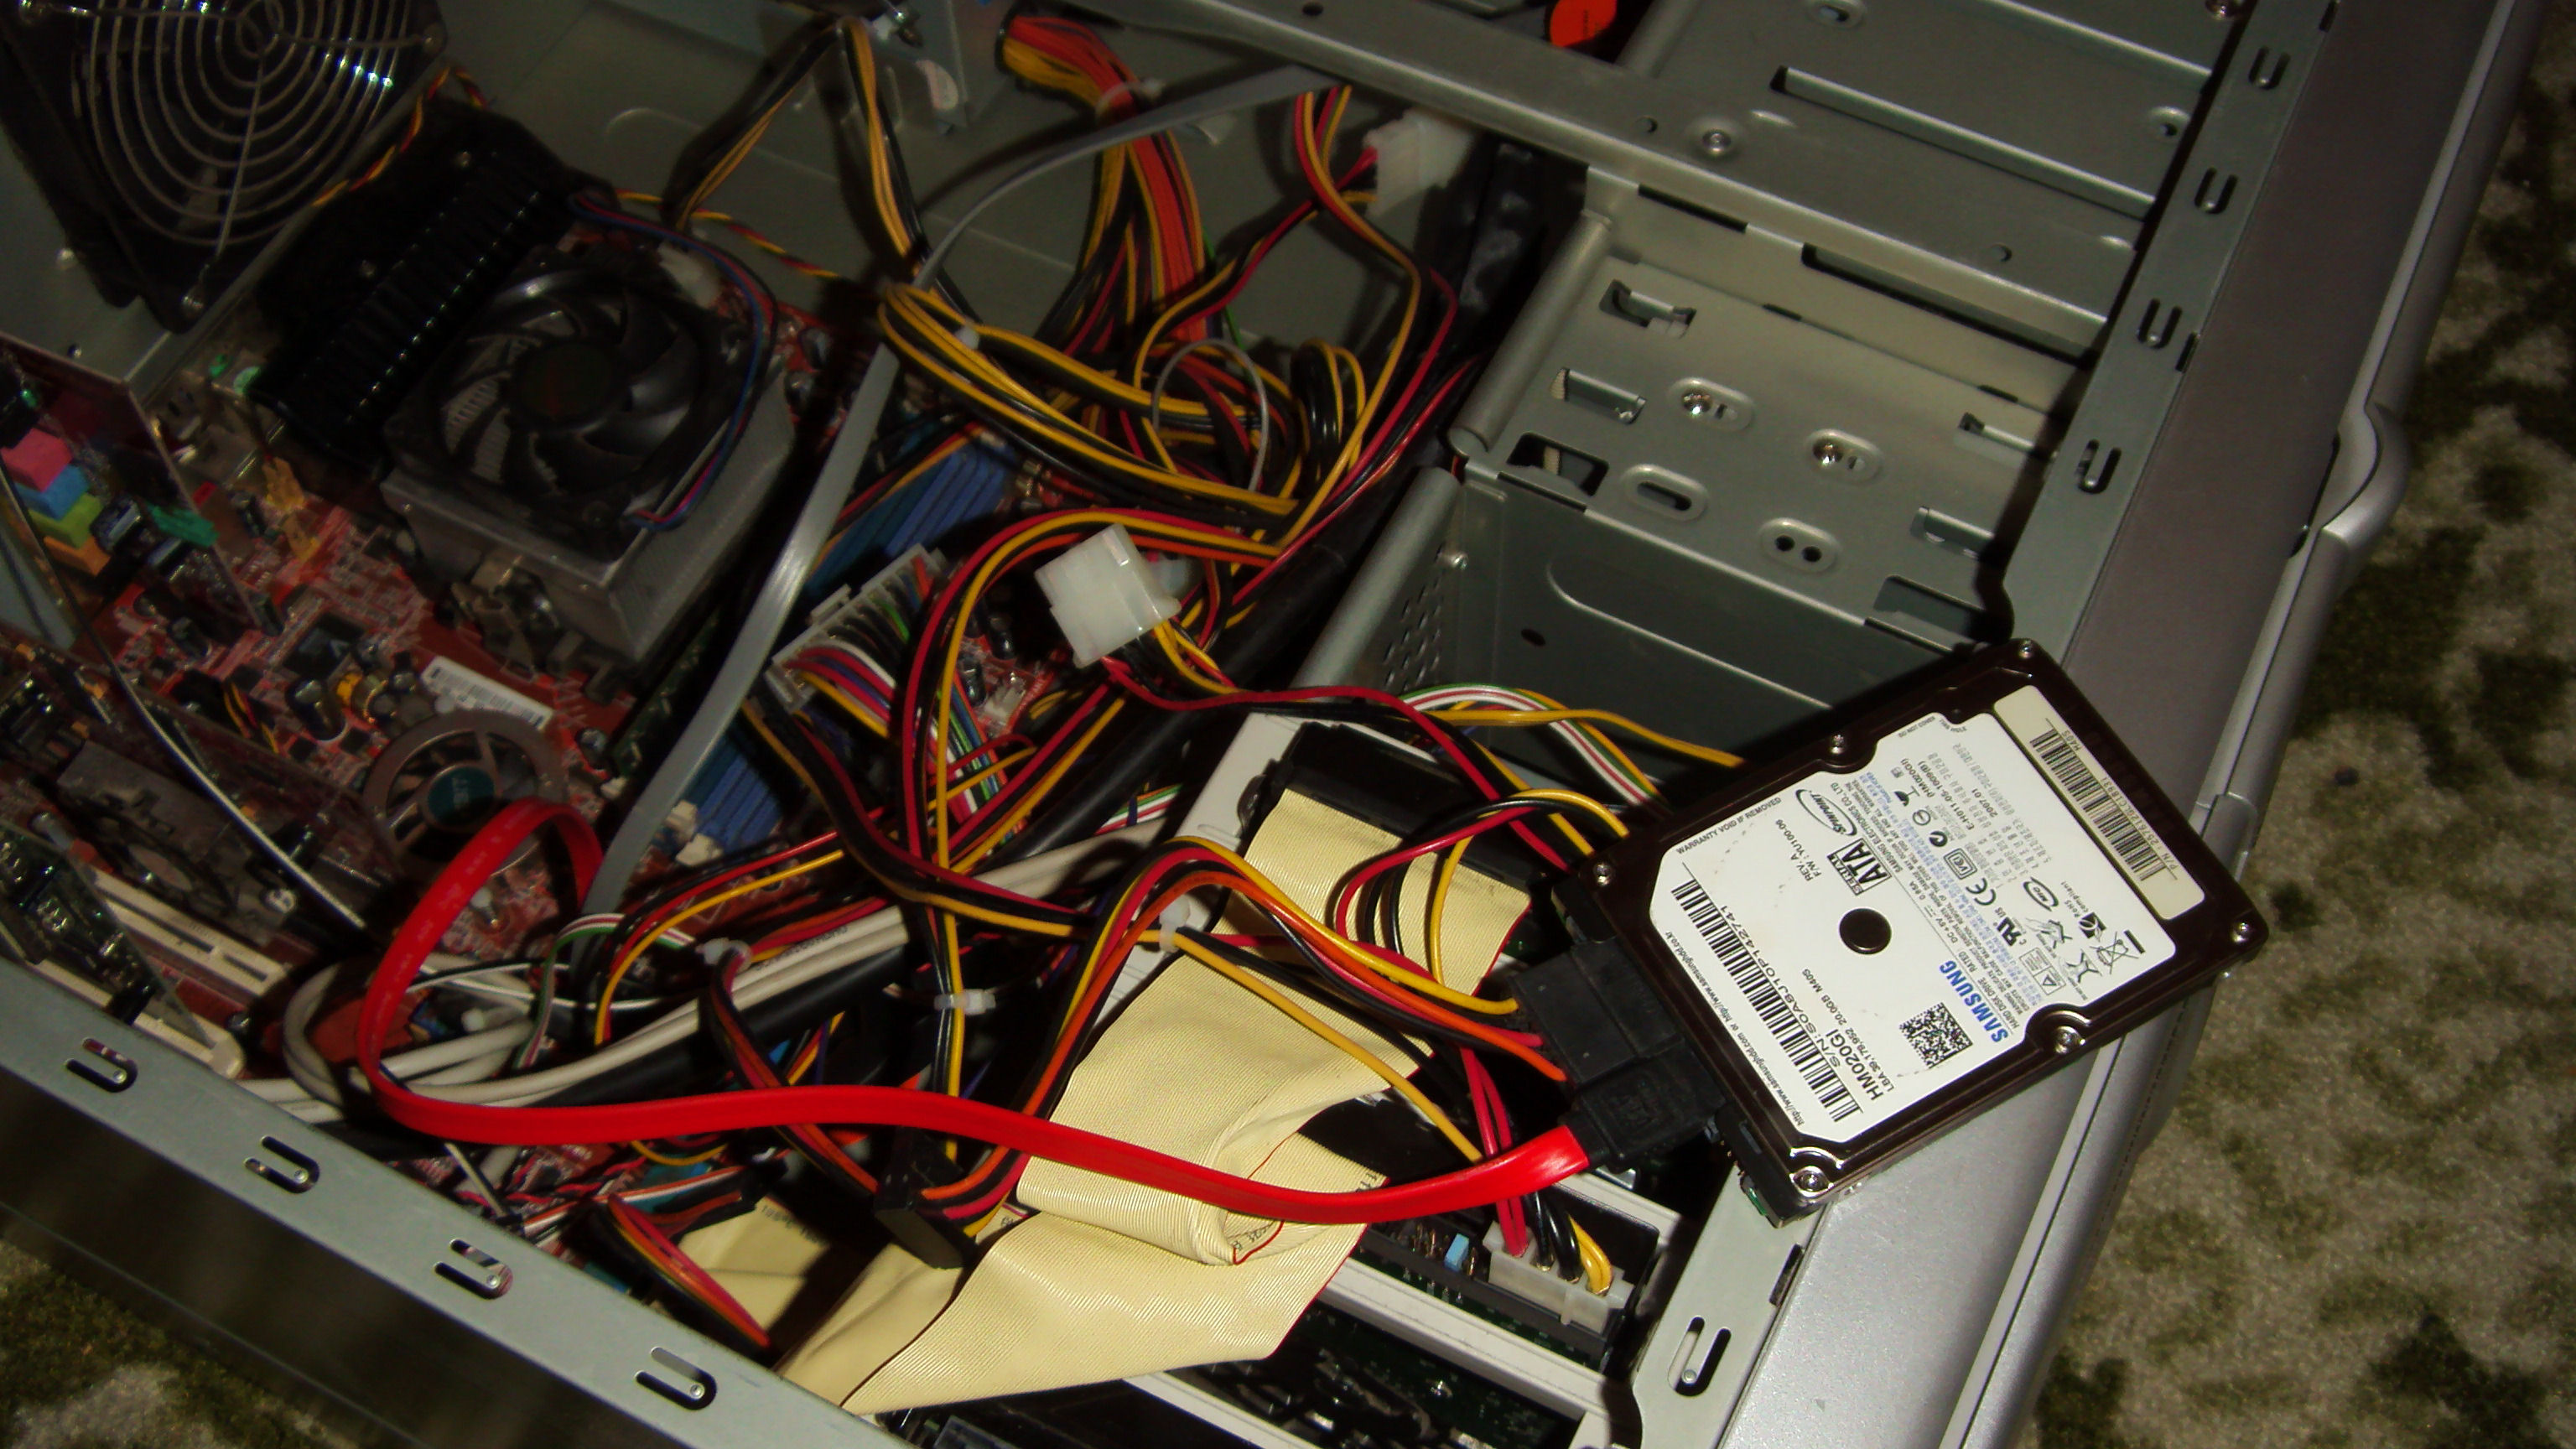
Figure 7: Xbox 360 HDD connected to computer
Figure 7 shows the Xbox 360 HDD (satandard 2.5" SATA HDD) connected to a computer with a normal SATA cable and power cable from the Power Supply Unit (PSU). Once it is connected to the computer, power it back up and boot into Windows.
Let's continue - Move to Page 2On the next page, we will look at using Xplorer360 to access and make changes to the Xbox 360 HDD filesystem, as well as making a backup image of the Xbox 360 HDD.Page 2 - Using Xplorer360 |
| Access Xbox 360 HDD in Windows & Backup | Viewing Page 1 -- Go To |