
Convert DTS to AC3
Introduction & Requirements
Download and install AVISynth --> You will need this item installed for MeGUI to operate correctly.
Download and install FFDShow --> You will need FFDShow installed to act as a DirectShow source for decoding DTS.
Download and install MeGUI --> You will need to use MeGUI as a frontend tool for FFMPEG and AviSynth.
Download and install .NET framework 2.0 --> MeGUI needs the .NET framework to function properly.
Install all of the above on to your system. Before we begin the process we need to just confirm that FFDShow is configured to decode DTS audio on your system. Go to your Start Menu and to All Programs, find FFDShow and open Audio Decoder Configuration.
Configure FFDShow to decode DTS
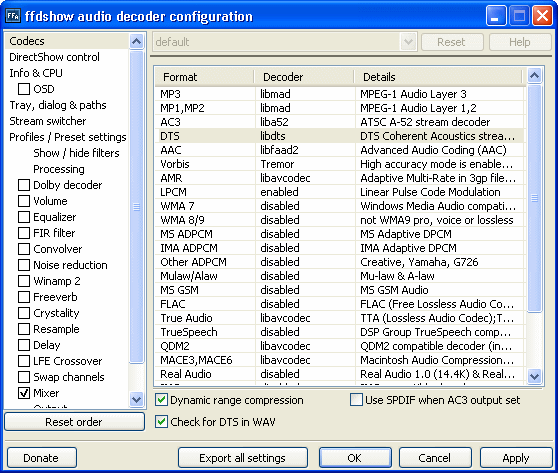 When you open Audio Decoder Configuration, don't get overwhelmed by the amount that you will see. All you need to do here is find DTS on the list. I have it selected in the picture to the right of this text (click to enlarge). In my picture, the decoder is set to libdts, you need to make sure your configuration is the same. If it says Disabled or otherwise, click on it and a small drop-menu will appear allowing you to change to libdts.
When you are done, click Apply and click OK (or just OK if you didn't change anything).
You should have installed MeGUI by now; launch it from your Start Menu.
MeGUI first run
 MeGUI is a very simple application to understand. Please make sure that you are connected to the Internet and that nothing is blocking access to MeGUI such as a firewall. A message will pop-up telling you that updates are available, ignore it for a second and move it out of your way but do NOT close it.
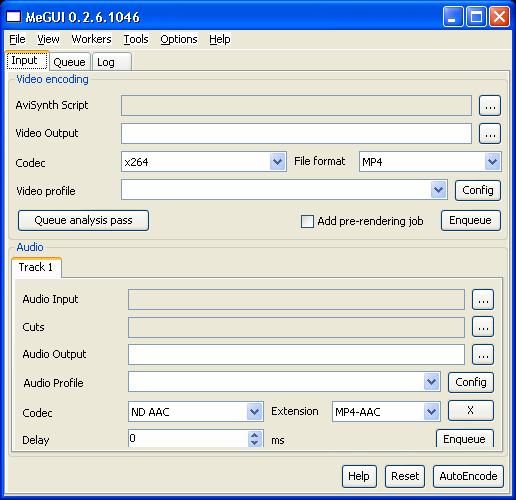
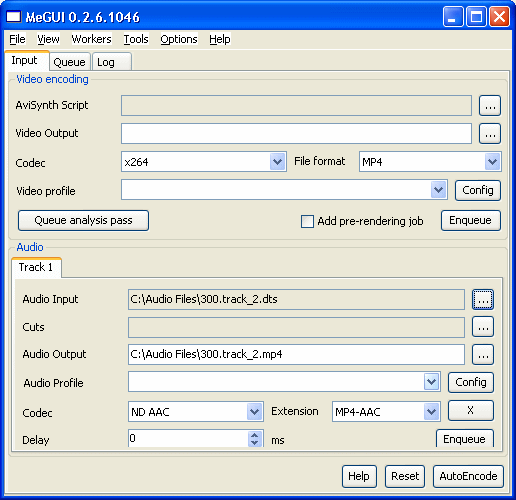
Look at the picture beside this text (click to enlarge). Briefly, there are three tabs and you are in the Input tab by default; the other two are Queue and Log. In the Input are two main sections, Video encoding and Audio. That's basically it. In this application you simply input your video or audio, click the Config buttons, make your settings, add to Queue and start, which we will see shortly, but first its time to update some applications.
Updates are available
 Go back to the message that popped up and click the Yes button. This will now open MeGUI's application update console.
Download FFMPEG
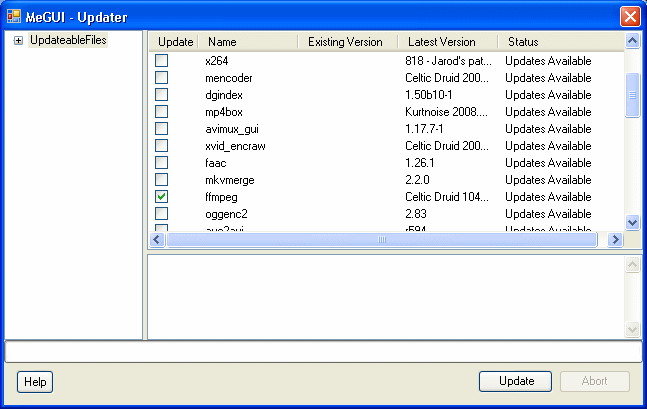 With the MeGUI update console window open, you will notice that all of the applications are selected by default. If you want to install all of these applications that is your choice, it won't harm your system in any way and it could come in useful in future. However, all you really need to get here is FFMPEG, so you can deselect all the rest if you want to update faster, just as I have done in the picture (click to enlarge).
The Update Process
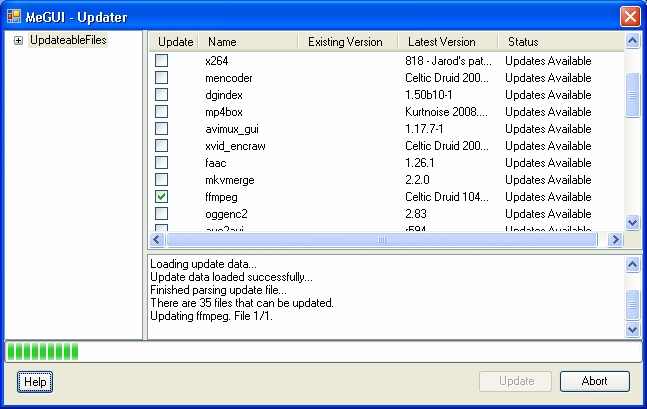 When you have made your selection in the update console window, click the Update button and MeGUI will automatically begin downloading the applications from the web and installing them. The amount of time this will take depends on how many programs you chose to update. When it is complete, you can exit the update window and go back to the MeGUI main window and load your source DTS file (see next).
Load Source DTS file
 Back on the MeGUI main window under the input tab, we will now focus on the Audio area, as seen in the picture with this text. Click the ... button beside the Audio Input field and browse through your hard disk drive to find the .dts audio file that you want to encode to AC3.
You will notice now that the Audio output field will fill in automatically, with the same filename except for a .mp4 extension. This setting is incorrect however and we must change it.
Set Output to AC3
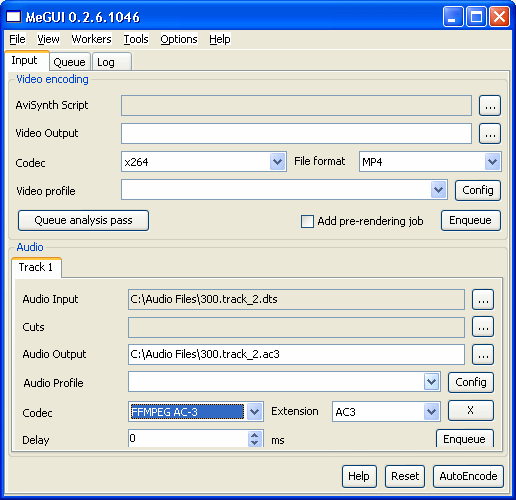 In the Audio area you must now change the Codec setting from ND AAC (default) to FFMPEG AC-3 as shown in the picture. This should also change the extension to AC3 by default. This process will output a file with the exact same name as the input file, and in the same folder, but with a .ac3 extension of course. If you want to change this you can click the ... button beside the Audio Output field and change it to whatever folder or filename you would prefer.
The next thing we need to do is configure the technical Output settings.
Configure AC3 output settings
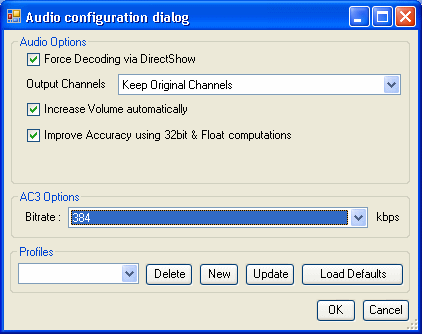 In the Audio area again, click the Config button.You will now see a similar window to the one shown in the picture (as always, click to enlarge if you need to). The first thing you must be absolutely sure to set here is the "Force Decoding via DirectShow" option. This will force FFDShow to decode the DTS audio and I have found it works almost every time for the conversion as opposed to some other decoders I tried.
The Output channels setting can be set to Keep Original Channels but in my experience it will output stereo (two channel) audio in any case so it really doesn't matter. This is probably an FFMPEG limitation. One last thing to set is Bitrate. If you had DTS before then you should set the bitrate to about 384kb/s which is sufficient for two-channels of audio.
When you have made these settings, click OK. When you get back to the main MeGUI window, click the Enqueue button to add the task to the program's work queue.
MeGUI Work Queue
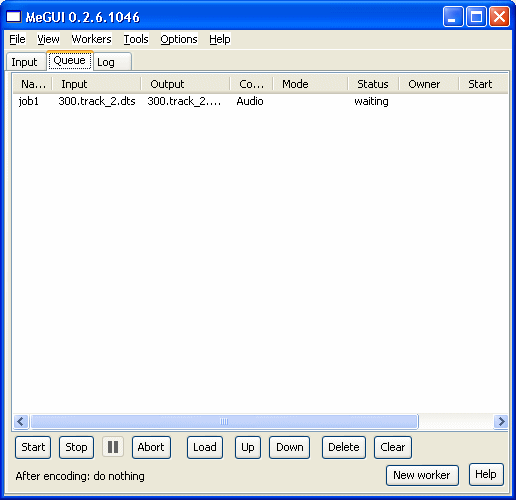 Click the Queue tab now beside the Input tab on the main window. You should now see your task waiting to be completed just like in the picture. Click the Start button and you should get a new pop-up window that asks you to create a new worker.
Create New Worker
 When the pop-up message that you can see in the picture pops up for you, you can leave it as the default Worker 1 or put in any name you want. This is just part of MeGUI's task management and it can be very useful if you and others use MeGUI a lot.
The Conversion Process
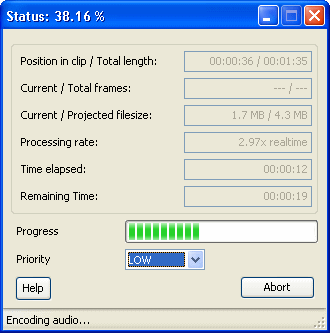 The amount of time the conversion takes depends on the length of the DTS file and other factors. Sometimes it can pause for quite a while before it begins work but hopefully it should work pretty quickly. When it is done, test the playback of your AC3 file (read a guide for playing AC3 here) to make sure it works and then attempt to use it in the place of the old DTS file.
Finally
Hopefully this article will have helped you to convert from DTS to AC3. It is not until recently that demand for this information really became significant as the DVD-Video specification required that AC3 audio always be present on a DVD with DTS audio. However, nowadays with HDTV recordings and files sourced from Blu-ray, this process is something required. If you need further assistance, please visit our Discussion Forums for help.
Version History
v1.0 - First published by Dela (08/05/2008)