
| Convert DVD to AVC with StaxRip | You are viewing Page 3 of 3 -- Go to page 1 , 2 , 3 |
Encoding
Before you can turn StaxRip loose with your input files you need to look at a few audio and video encoding options that may vary from one movie to the next.
 |
1. Audio
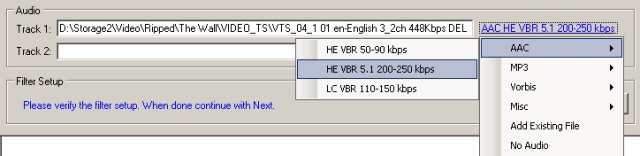 |
StaxRip will automatically add the first audio track from your DVD for you and set it to be downmixed to stereo (assuming it's full surround sound to begin with) and encoded in AAC format. Since we'll be creating an MP4 file with our encoded video this is the only audio format we'll be able to use, but if you want you can keep all surround channels. If you wish to keep all 6 channels you can click the menu-link that says AAC HE VBR 50-90 kbps and select AAC HE VBR 5.1 200-290 kbps under AAC.
2. VBR Encoding
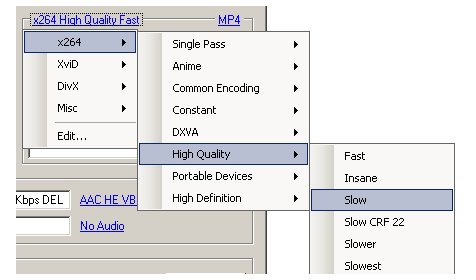
In order to ensure we end up with a precise output size it's necessary to change the encoding mode from it's default setting to one of the many VBR options. Click the encoding mode menu-link, which defaults to x264 High Quality Slow CRF 22, and look at the entries under x264. The best choices for most encoding are generally found under High Quality, although if your movie is animated you may get better results with one of the Anime options instead.
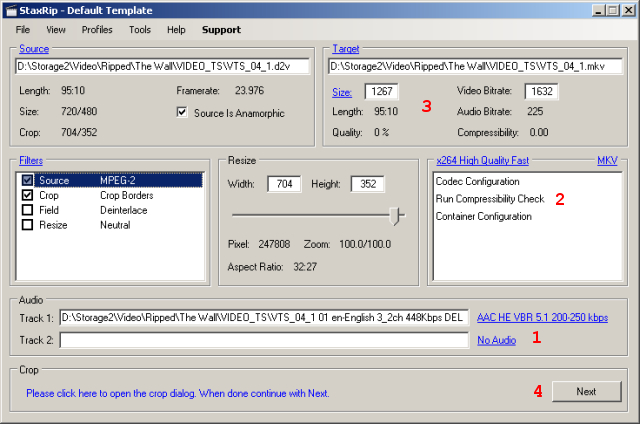
3. Output Size and Video Bitrate
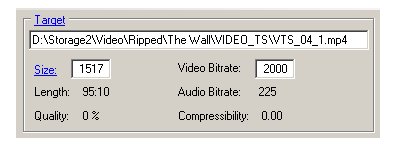
The last step before encoding will be to tell StaxRip what bitrate the video should be. This can be done directily in the Video Bitrate text box, but generally it's better to look at overall size (including audio) instead since most people encode to fit a certain media size. If you know how big, in Megabyes, you want your output to be you can enter it for Size. For a standard CD you should use 700. For 1/3 of a DVD it would be around 1495, while 1/2 of a DVD should be approximately 2245. Of course you can choose any size you want.
Target
To set the location and name of your output MP4 file click the Target menu-link and browse to the desired location. Then enter the name and click OK.
4. Encoding
 |
Once you've set all the relevant options you can get started encoding. Simply click the Next button several times until the Jobs dialog appears. There should be a job at the bottom of the list with the same name as your Target (output file).
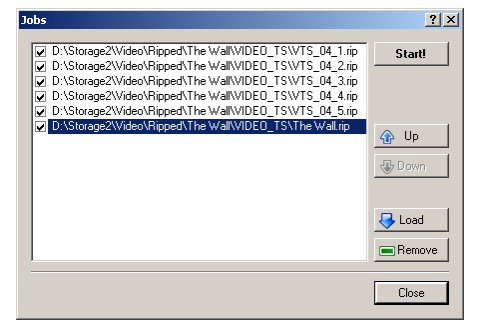
Click the Start! button and wait for encoding to finish. Expect it to take at least 2-4 as long as the video runs for. In ther words an hour of video will take no less than 2 hours to encode on most computers, and usually much longer than that.
Encode
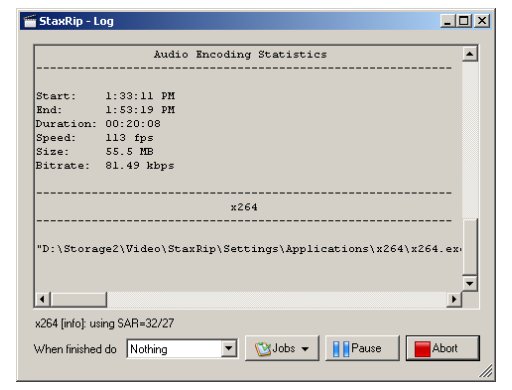
As the audio and video are encoded you can monitor the progress in the Log window. Once the main StaxRip window appears again your output file is ready.
Where to go nextIf you need help playing your newly created MP4 file you should take a look at our guide for Playing MP4 Files. | |
| Convert DVD to AVC with StaxRip | You are viewing Page 3 of 3 -- Go to page 1 , 2 , 3 |
Related GuidesHaali Media SplitterIf you want to play MKV or MP4 files in Windows you may need to install the Haali Media Splitter. Our guide titled Introduction to Haali Media Splitter walks you through installation of this excellent free software.ffdshowIf you want to watch AVC video on your PC you'll need an AVC encoder, like the one included in ffdshow. Read our guide on ffdshow Installation and Configuration to learn more about using ffdshow to play video encoded with x264.AC3FilterIf you need to play AC-3 audio on your PC you can use AC3Filter for playback or passthrough to an external receiver digitally. Our guide on AC3Filter Installation and Configurationwill help you configure your computer to play a variety of surround sound sources. |
Version History
v1.0 Original version by Rich FiscusTable of Contents
- Introduction
- Loading Your DVD Source
- Encoding