
| DVD to AVC with MeGUI Part 3 | You are viewing Page 4 of 5 -- Go to page 1 , 2 , 3 , 4 , 5 |
Video Encoding
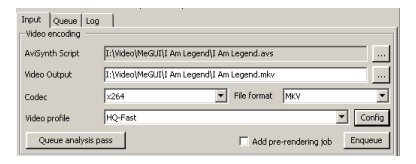
Finally it's time for the final steps before encoding your video to AVC. You should already have your Video profile set. If it's a bitrate based profile the bitrate should have been loaded from the Bitrate Calculator. There are a few more options you may need to consider before you queue your encoding job.
Video Profile Configuration
Click the Config button to open the AVC encoder configuration to view or change these options. If you find yourself changing a lot of settings on a regular basis you may want to try a different profile or save your changes to a custom profile. You can get help with this in our guide on Customizing x264 Profiles with MeGUI. For the purposes of this guide we'll assume that the majority of the settings from your profile are correct and only cover a couple of very basic settings.

Bitrate or Quality
If you're encoding to a specific bitrate, rather than a particular quality (CRF) the bitrate should already be set by the Bitrate Calculator. If you wish you can add a third encoding pass, which is sometimes helpful for encoding very complex material. If you're encoding to a Constant Quality you'll need to set the desired CRF (Constant Rate Factor) manually. Enter a value no lower than 18. The higher the number, the lower the quality.
Interlaced Encoding
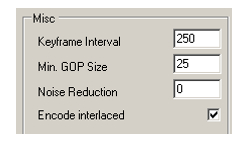
At the top right of the RC and ME tab is a checkbox to Encode interlaced. Make sure this checked if you're leaving video interlaced to match the source. Otherwise it should remain unchecked.
Encoding
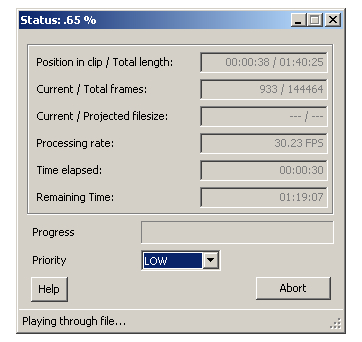
Once you've set the interlacing, and if applicable CRF settings you can click the OK button. Make sure to answer Yes to updating the profile in order to save any changes. Back in the main MeGUI window use the Enqueue button to create a new job in the queue. Once you start the encoding job on the Queue tab a progress dialog will open, providing various information about how much video has been encoded, when the job is expected to be complete, and how big the output file is expected to be. Size prediction will tend to be inaccurate if you're using a Constant Quality video profile.
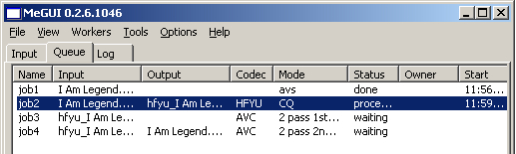 |
You can get a less detailed progress update from the main MeGUI window, where each job changes to a status of processing during the encoding process, and then to done when it completes. After both audio and video encoded you'll be ready to put together your MKV or MP4 file.
Continued On Page 5Next Page 5 - Creating Your MKV or MP4 File | |
| DVD to AVC with MeGUI Part 3 | You are viewing Page 4 of 5 -- Go to page 1 , 2 , 3 , 4 , 5 |
|
|