
IMPORTANT: Newer / Easier GuideNOTE: This guide, while still working, is outdated and uses a complicated method to achieve this task. Luckily, AfterDawn can now offer a much easier solution that doesn't use as many programs and will take only a fraction of the time to complete. Convert MKV to MP4 for Xbox 360 (Easiest Method)In this guide we use a program called GotSent that will automatically handle all the steps that we previously had to take manually. So try the new guide out first, and if it doesn't work, you can always come back to this one. |
Prepare content from MKV for Xbox 360
 This article we will take content from the MKV (matroska) container and store it in either the MP4 or AVI container, depending on the type of video and audio we are dealing with. Why do this? The Xbox 360 console does not support the MKV container directly, but by simply taking the content stored in the MKV container and placing it in either the MP4 container (for H.264/AVC) or the AVI container, this avoids a total re-encode of video, which is the solution offered by several commercial software items. Here we use freeware for better results. Click here to see what the Xbox 360 will play directly as of February 2008.
How this guide is structured
Software you need
| MKVToolnix | This is a software package of tools for MKV files provided by the team behind Matroska. |
| MKVExtractGUI | This is a GUI for MKVExtract.exe which is found in the installed directory of MKVToolnix. |
| VideoInspector | This is a video file information tool. It will tell us about the streams container in our MKV files. |
| Nero AAC files | These are free files for encoding/decoding AAC streams provided by Nero AG. |
| MeGUI | This is a frontend program used to accomplish many tasks including encoding and muxing. |
| h264info | This tool can change the level setting of an AVC stream if required. |
| MP4Box | This is a command-line based tool for creating MP4 files. |
| YAMB | This is a GUI for MP4Box. |
| WinRAR | This item is required to extract files from some of our download archives. |
| VirtualDUBMOD | This is a modified version of the popular VirtualDUB tool. This supports opening and saving MKV. |
You can go ahead and download all of the above now if you wish. Over the instructions, I will reference these items again and link to them, as well as lay out what needs to be done with some that aren't simple installation packages. The first thing you need to do is install check our MKV files with VideoInspector.
Step 1 - Get important information on MKV streams |
Get information on streams inside MKV files with VideoInspector
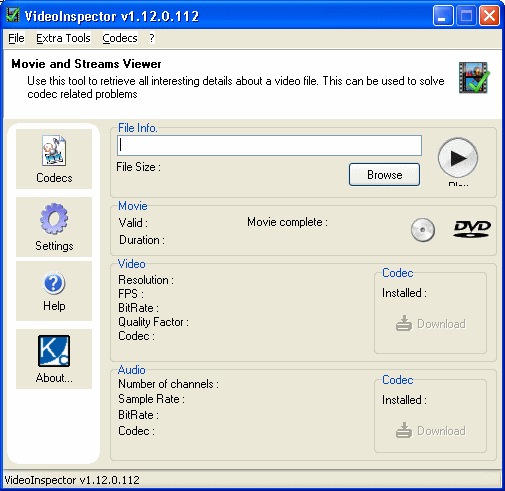 Download and install VideoInspector. On your first run of the program you will notice that it is not very complex. As we can see in the image (click to enlarge), there is only one main input field and that's for the input video file. You can now use this by clicking the browse button which will bring up an Explorer Files Browser. Navigate to the MKV file you want to examine and open it.
Alternatively, you can just drag and drop the MKV file onto the running application and that will work just as well.
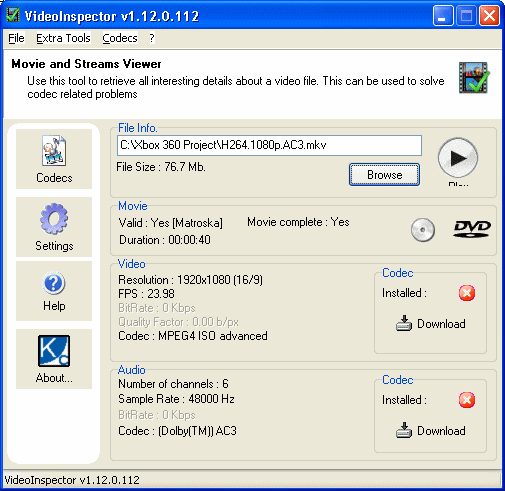 After a few seconds you should now receive information on the streams stored inside your MKV file, just as in the image that accompanies this text (click to enlarge). In my case, it reads the video as MPEG4 ISO advanced. My video stream is H264/AVC, which is very common for files with such a high resolution as this file (1920x1080).
Please take note of the framerate of FPS of your video. In my example it is 23.98 (23.976 is the NTSC Film spec) and this may be important information later on when creating an MP4 file. Now look at my audio. I have 6 channel AC3 audio. This sounds great, but unfortunately later it will have to be converted to AAC LC for compliance with Xbox 360's playback specs.
Finally, and very importantly, if you got XviD or DivX or something similar as the Codec that is required to decode your video, then you should go directly to page two which shows a method using VirtualDUBMOD by clicking here. Depending on your codec setup however, this may not be very clear yet. However, it will be in the next step if you hang on.
Step 2 - Prepare MKVExtractGUI |
MKVToolnix
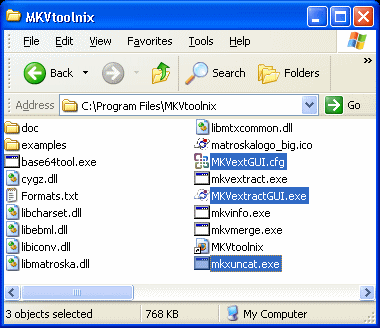
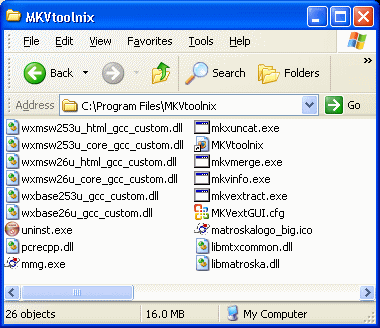 Once you have run through the installation of MKVToolnix, you now should be left with a start menu group for it that allows you to access MKVmerge and MKVinfo GUI. However, what I want you to do is instead navigate to the installation directory of MKVtoolnix. In most cases, and in the picture shown with this text, this directory is C:\Program Files\mkvtoolnix
If you cannot find the installation directory, then click Start --> All programs --> MKVToolnix. Right-click on the MKV merge icon and click Properties. From here, click the Shortcut tab. Now click the Find Target button and the installation directory should open much like the image accompanying this text.
Keep this folder open now, as it is time to copy in the files from the MKVExtractGUI RAR archive.
Setup MKVExtractGUI
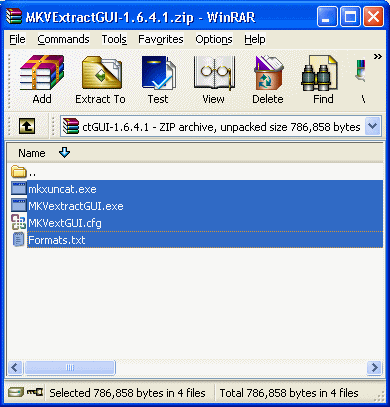 Download MKVExtractGUI. You will get a RAR file. You may need to install WinRAR to open it as seen in the picture beside this text. Once you get it opened, you will notice there are four files there, mkvuncat.exe, mkvextractgui.exe, mkvextgui.cfg and formats.txt.
We now must copy these files into the installation directory of MKVtoolnix which you should already have open from the last step. To extract into this folder in the easiest way possible, simply select all the files in WinRAR (CTRL + A) as shown in the picture, and now drag and drop these files over into the folder.
Once that is done and the files have been successfully extracted from the RAR archive and appear in the MKVtoolnix folder, you can close WinRAR again.
 Now as you can see the four files will be apart of the MKVtoolnix folder. The reason they had to be copied is that mkvextract.exe is part of the mkvtoolnix installation. As a Graphical User Interface for mkvextract.exe, what we have just done will speed things up and simplify the process overall for a user of any knowledge level with computers.
Step 3 - Extract Video and Audio streams from MKV file |
MKVExtractGUI
 You should still have the MKVtoolnix folder open as I didn't tell you to close it. If you do, then run MKVExtractGUI.exe. As you can see in the image (click to enlarge), we are again dealing with a fairly easy application to understand. There is an input field and output field, a box to show details of the MKV files' contents, an Extract button and Uncat button and a small box with more information.
Click the button beside the input field to attempt to open your MKV file.
Identifying your video
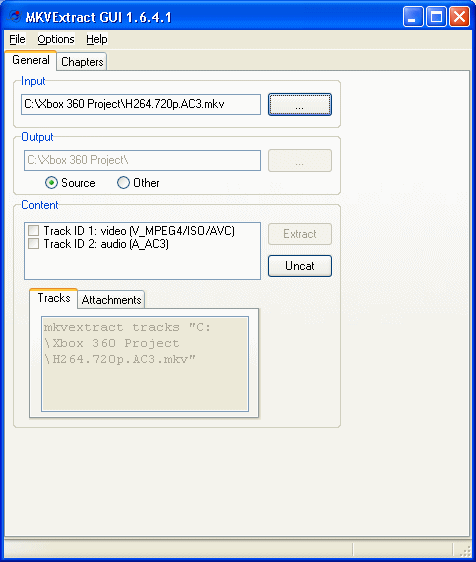 You should now be able to see some streams in the Content box like in the image (click to enlarge). If streams did not actually display, then attempt clicking the Uncat button. Please note that this will mux an entirely new MKV file in the same folder as the source with a slightly altered filename (an added 0), so make sure you have enough space for that. Give it time to complete and when you have a file almost exactly the same as your original, open it with MKVExtractGUI and this time it should work.
Now, look at the content. In my example my video is "V_MPEG4/ISO/AVC". Notice the AVC, this indicates I have a H264/AVC stream, which, going by the Xbox 360 playback table, means I need to put this into an MP4 container for it to play on my Xbox 360. Again, if your results indicate XviD or otherwise, then go right to the the second page by clicking here so you can follow a VirtualDUBMOD method.
In my example, I also have AC3 audio. That's a problem. I cannot have AC3 audio with AVC video in an MP4 container and play it on an Xbox 360, so my audio needs to be re-encoded to AAC LC later on. For now though we will focus on extracting both the video and audio stream we need (extract all audio if there are multiple).
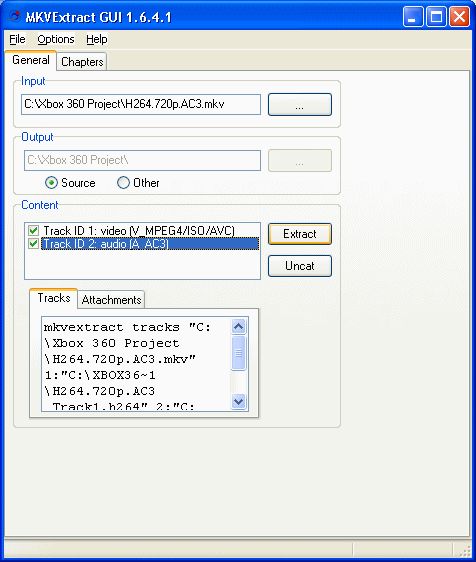 Tick the boxes beside any streams you want to Extract. You will notice the Extract button is now clickable. It is also worth mentioning that the Output folder for this process is generally the folder as the original file.
Select all your streams and click the Extract button. Now give MKVExtractGUI some time to save these files to your disk (the larger the file the longer the process).
Finding your demuxed files
 Once MKV Extract completes its processing, it will throw up a Success message like the one you see with this text. Now go to the folder where your MKV file(s) is stored.
 You should now be able to find the raw video stream, which will have a .h264 extension. In my example picture (click to enlarge), my raw h264 video file is titled H264.720p.AC3_Track1.H264 and my audio is H264.720p.AC3_Track2.ac3. If my audio was MP3 it will have a .MP3 extension and so on. The filenames of the raw video and audio will be the same as the original file with the track number added to the end of the filename.
If you have multiple audio tracks, please play them one by one (VLC Media Player recommended) and determine which audio stream you want to keep because the Xbox 360 won't let you change them later on anyway. Delete the rest and just keep the audio file that you require for the completed output MP4 file.
The next thing we need to do now is prepare our audio.
Step 4 - Convert AC3 (multichannel) audio (or MP3) to AAC LC |
Get Nero AAC encoder and Setup MeGUI
 Once you have installed MeGUI onto your computer, and have downloaded the ZIP file containing the Nero AAC files, please open the Nero ZIP file (should open in WinRAR). There are four files inside the NeroDigitalAudio.ZIP, neroAacTag.exe, neroAacEnc_SSE.exe, neroAacEnc.exe and neroAacDec.exe.
The neroAacEnc_SEE.exe file is specifically for computers that have processors that support SEE2. If your Intel or AMD64 chip does support SEE2, then that's the file we are looking for. If not (or if unsure), then neroAacEnc.exe is what we are looking for.
What to do with them? The idea is to put them into the installation directory of MeGUI. Go ahead and install MeGUI, then either go to its installation directory at its default of C:\Program Files\megui or again, click Start --> All programs --> MeGui. Right click on "MeGUI modern media encoder" and click properties. Click the shortcut tab and then click the Find Target button. This will open the MeGUI installation directory.
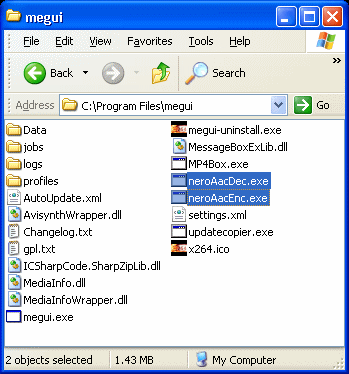 Copy over the required (or all) Nero AAC encoder files from the ZIP archive by selecting them and dragging them out into the folder with the mouse. Once this is done, you can now run MeGUI from the start menu or megui.exe in the installation directory.
If the program crashes, which is a common bug, you may try to deny it Internet access by setting up a fake proxy server in Control Panel --> Internet Options --> Connections tab --> LAN Settings. Do NOT do this if you do not need to, and don't do it if you are currently reading this in Internet Explorer (if you are, get Firefox!). For some reason, the update application with MeGUI has caused myself and some other friends issues when it runs and tries to access the Internet.
One last thing you will definitely need in order to run MeGUI properly is the .NET framework, at least v2.0. Click here to download.
Encode AC3 to AAC-LC with MeGUI / Nero AAC encoder
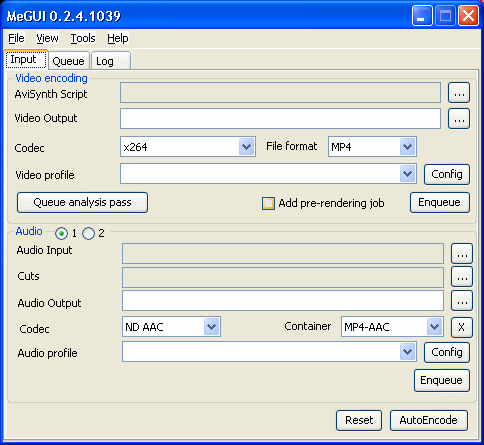 MeGUI looks a bit more complicated than any of the applications we have come up against so far. The only part of MeGUI we need to focus on right now is the Audio part. It's not that difficult. You select your audio input and Audio output, make some changes to the configuration and then click "Enqueue" to Queue the process.
Click the button beside the Audio Input field and locate the AC3, MP3 or other audio file you got from your MKV file.
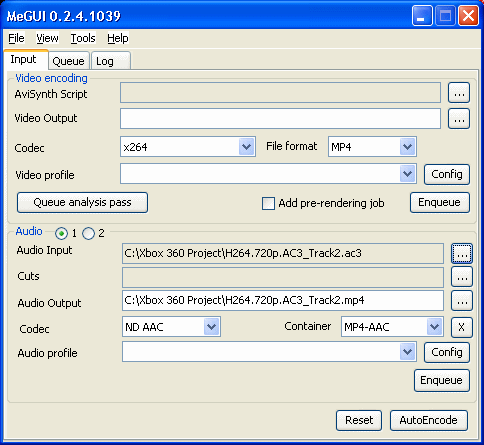 Now that you have loaded in your input file, the Audio Output field will fill in automatically and put a .MP4 extension onto the output filename. This is perfectly fine and you don't need to change anything unless you want to. Make sure to set Codec to ND AAC and container to MP4-AAC. Beside Audio Profile, click the Config button.
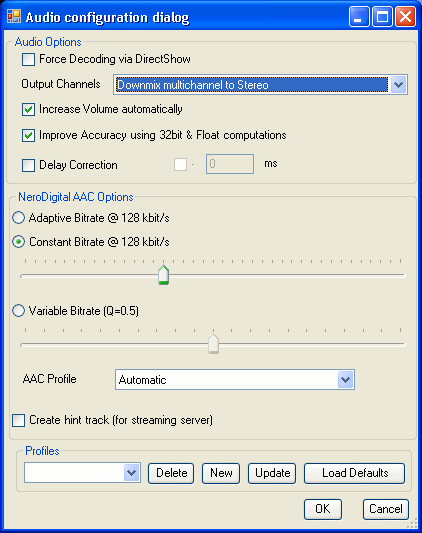 If you have an AC3 file with more channels than stereo (2 channels) based on what VideoInspector told you, like mine is, then you need to set Output Channels to Downmix multichannel to Stereo for compatibility with Xbox 360. If the AC3 is already 2 channel Stereo audio, or it is a 2 channel standard MP3, then set it to Keep Original Channels. I would also recommend setting Constant Bitrate and using the slider to select 128 kbit/s. With AAC audio, 128 kbit/s is generally higher quality than the MP3 standard at that bitrate and should sound very good after the conversion.
AAC profile should be either set to automatic or AAC LC manually. When you have changed your settings to reflect this, click the OK button. This will take you back to MeGUI, where you should now click the Enqueue button. After you click it, click the Queue tab.
 You will now see your conversion has been queued by MeGUI with a status of waiting. The queue system is very useful when you have a lot of files to convert, which is usually the case when you are creating AVC video from another source.
When you are ready, click Start to get the process going.
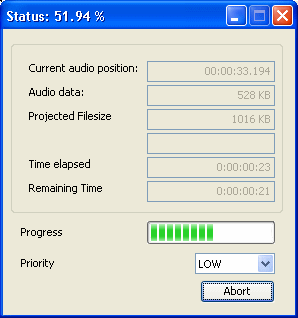 MeGUI will now use the Nero encoder files you extracted into the MeGUI program files folder to convert your AC3 or MP3 etc. audio to AAC LC audio for the Xbox 360 to play. The amount of time that this process will take depends entirely on the length and size of the input AC3 or other audio file.
Once it is completed, go to the folder that you had the original audio file in and you should now find your new MP4 file containing your AAC video stream, ready to be muxed with the original H264/AVC video you got from MKVExtractGUI into an MP4 file that should play on the Xbox 360.
Next up we have muxing and possibly a little extra work to be done on the h264 stream to make it 360-ready.
Step 5 - Mux H264/AVC video with AAC LC audio using YAMB/MP4Box |
Setup YAMB with MP4Box
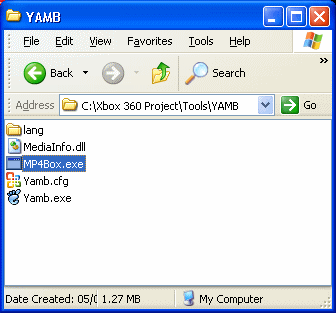 Download YAMB and MP4Box. The YAMB and MP4Box downloads are ZIP files that will open with WinRAR. Open the YAMB ZIP file first. Create a new folder anywhere on your hard disk drive and drag all the contents of the ZIP file into this new folder. When you have done that, now open the MP4Box ZIP file and drag mp4box.exe into the same folder that you placed the YAMB files into.
MP4Box is a command line tool and YAMB is a GUI that can utilize MP4Box.exe, making it a lot easier on you to make MP4 files. Now its time to open YAMB.exe.
YAMB/MP4Box
 YAMB is a very useful and user-friendly GUI tool for MP4Box. It is incredibly easy to setup also. There is only one thing you need to do before you can use YAMB properly, and that is to specify where MP4Box.exe is, even though you have it in the exact same folder.
Click the Settings button on the left hand side of YAMB.
Specify location of MP4Box.exe
 Click MP4box.exe on the left side of the window (click my image to enlarge to show). Now beside the location field, click the small folder icon which will open an Explorer File Browser. Navigate to the YAMB folder that you created and double click MP4Box.exe.
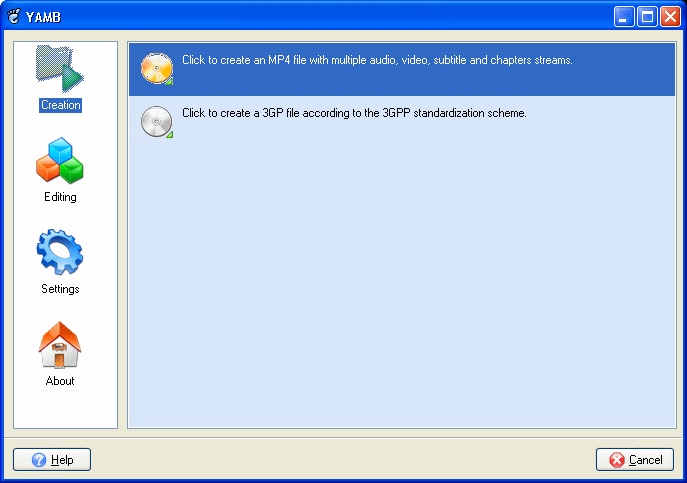
When you have it selected correctly simply press back until you get to the main YAMB window again. Double click the Click to create an MP4 file with multiple audio, video, subtitles and chapters streams option.
Add Video and Audio stream
 You will now be able to select the files you wish to mux into a new MP4 file for use with your Xbox 360 console. Remember the .h264 file you got from MKVExtract and the .MP4 file you got from MeGUI containing your AAC audio? Click the Add button and Navigate to the folder they are stored in and select both.
If many chapters data is added here from the MP4 file, you can select it and click Delete as it will be useless to the Xbox 360. Now, here is where we determine whether we need to make any more changed to our H264 (video) file before muxing. Please bare with me for a second.
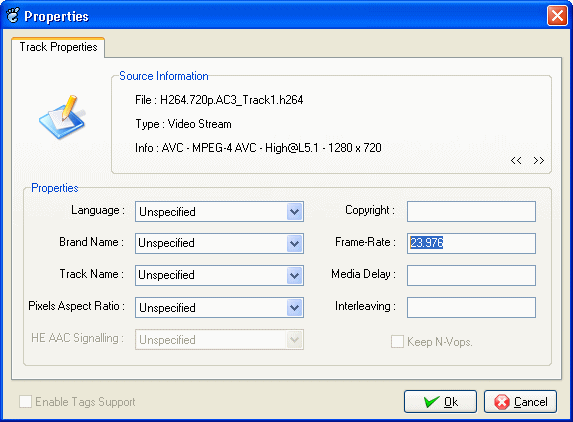
The Xbox 360 does indeed support the H264/AVC video standard inside the MP4 container. However, specifically the Xbox 360 supports AVC up to High Profile (HiP) Level 4.1. Unfortunately, a lot of files that don't need to be, are specified as level 5.1, as seen for example in the accompanying picture. If you try to play these streams on an Xbox 360 as of February 2008, you will get a black screen, even though in 99% of cases the Xbox is more than capable of playing this particular file. Luckily there is a fix for this problem.. or rather a workaround as editing anything like this in an already encoded file is generally not recommended.
Look at the description of my AVC stream. "AVC - MPEG-4 AVC High@L5.1 - 1280 x 720". This is a problem because of the L5.1. Note also that you wont always get level information from this and may actually get a black screen on your Xbox 360 anyway. So if you have up to L4.1, you are OK, but if you have over that, you will have to use a workaround for this problem.
If you need to set the H.264 level of your video file for compliance with the Xbox 360 console, or if you experience a black screen with just audio, then click here to go to an optional page of this guide that covers a workaround for this problem using a tool called h264info. When you are done, click the "Go back to muxing step" link on the page to come right back here.
Step 5 continued
If you just repaired your file, replace the AVC stream loaded into YAMB with the new one created for you by h264info. If not, then just continue on. You may be asked to specify the framerate of your AVC video stream at this point. I told you to remember it all the way back at VideoInspector.
AVC Stream Properties
 A lot of the time YAMB guesses the framerate correctly and won't need your input, but sometimes it will ask. Always remember the Framerate when you check the MKV file first. When done, click OK.
The Muxing Process
 YAMB will now use MP4Box.exe to mux the video and audio stream that you used as your input streams. The amount of time this will take depends entirely on the speed of your computer and the files themselves.
When it is finished, check the resulting MP4 file with something like VideoLAN client to make sure you have perfect sync and proper playback (note that HD playback may be poor on older computers). Then burn it to a disc or stream it to your Xbox 360 and see how it plays.
That concludes the instructions for Extracting streams from an MKV file and muxing them into the MP4 container for Xbox 360 support. If you have any questions, please visit our Discussion Forums for help.