
Join AVI files with VBR MP3 audio using VirtualDUBMOD
 This article covers the process of using VirtualDUBMOD to join together two AVI files that contain VBR MP3 audio. Using VirtualDUBMOD solves some problems that arise while trying this with the original VirtualDUB client.
Introduction & Requirements
Download VirtualDUBMOD --> Download VirtualDUBMOD from AfterDawn and extract it using WinRAR into any folder you want.
This guide is intended to be used with two AVI files that have been produced during a DVDRip process or something similar. Usually if you convert a DVD to DivX or XviD, the file sizes are limited to 700MB to fit on a blank CD. In this guide you will be able to join the files using VirtualDUBMOD even if you have VBR MP3 audio which can cause problems with the regular VirtualDUB.
Open VirtualDUBMOD
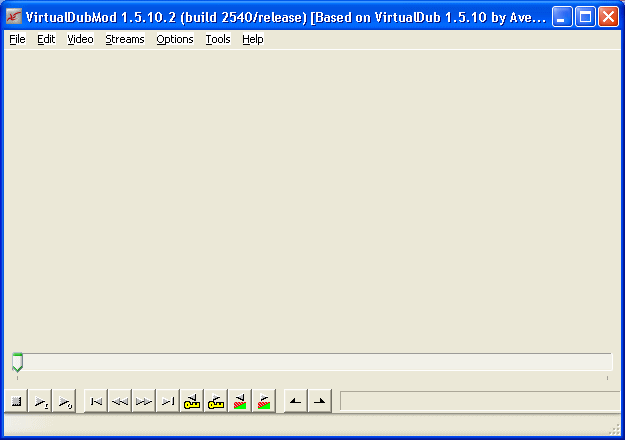 VirtualDUBMOD is almost identical at first glance to the original client, but its differences become apparent when you want to work with audio streams in particular. It also supports the MKV container and OGM containers, not just AVI.
Open First AVI file
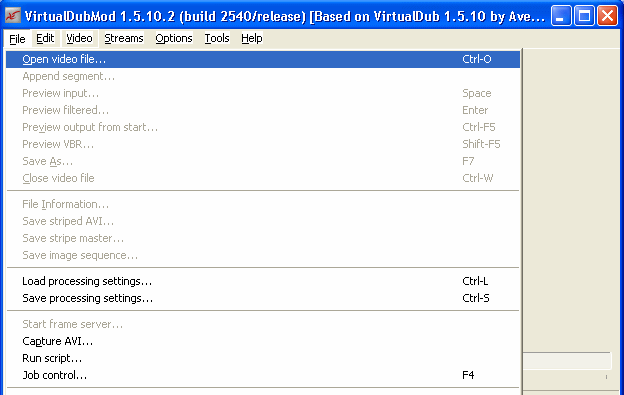 To open the first AVI file, click File --> Open video file. Use the file browser that pops up to find the first AVI file (the start of the movie etc.), select it and click Open. If your file contains VBR MP3 audio you will now get a pop-up message.
Do not re-write header
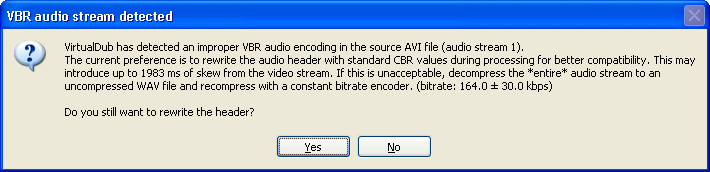 In a nutshell, in order for VirtualDUBMOD (and the original client) to perform properly, it usually would re-write the headers of the MP3 stream in the AVI file if it is VBR audio. However, if this happens when you are trying to join, you will get an error message when you try to open the second AVI file. Therefore you must click the No button.
Seek to last frame
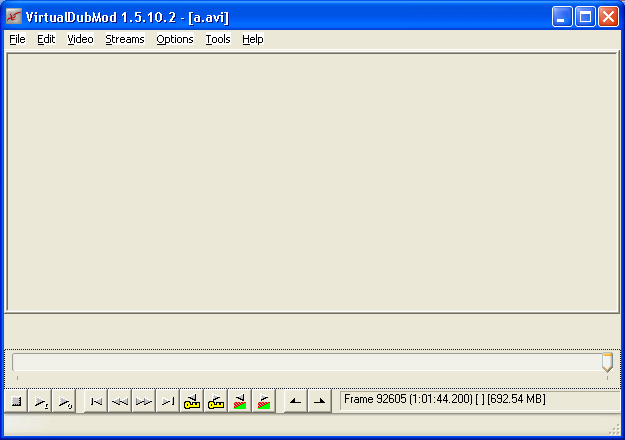 Now that your video is open, you will notice that you can seek the video using the slider at the bottom of the program. Slide it all the way to the end of the video stream and hit the right direction key to make sure that you are at the very last frame.
It is now time to open the second AVI file.
Append Segment
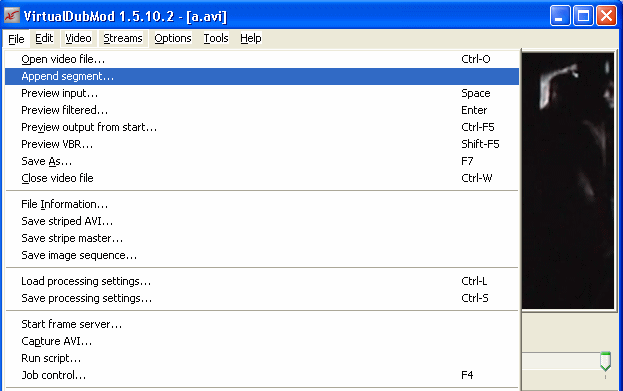 With the last frame of the first file selected, click File --> Append Segment. Now with the file browser, find the second AVI file that you wish to merge to the end of the first file, select it, and click Open. If all went well, both should now be loaded into VirtualDUBMOD ready to be saved as a single AVI file. However, there is one more vitally important thing to do before that.
Set Video to Direct Stream Copy
 Unless you want to re-encode the entire video to uncompressed video (default), this step is very important. Click Video and select Direct Stream Copy. This will now copy the video stream stored in the AVI files 1:1 and won't degrade the quality or produce a massive file. The next step now is to save the file.
Save AVI file
 To save the file, Click File --> Save as.. and a new file browser will open up, looking like the one in the picture to the right of this text.
Find the folder you wish to save the merged AVI file in and type a new filename. When you are done, click Save.
The Merging Process
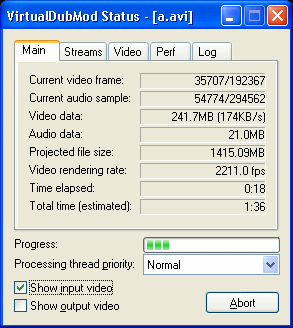 The amount of time that it will take for VirtualDUBMOD to merge both the AVI files into a single long AVI file depends on the speed of your computer and the size of the files. However, it should only take a few short minutes at most since Direct Stream Copy is selected.
Finally
Hopefully this article will have shown you how to easily merge two AVI files with VBR MP3 audio without getting any sampling rate errors. If you need more assistance, please visit our Discussion Forums and ask for help.
Version History
v1.0 -- First Version Online by Dela (09/05/2008)