| AutoMKV Installation and Configuration | You are viewing Page 5 of 5 -- Go to page 1 , 2 , 3 , 4 , 5 |
AutoMKV and encoding Profiles
AutoMKV includes a wide variety of profiles, covering most scenarios you're likely to encounter. If you're encoding video for a specific type of hardware, such as an iPod or game console, there are generally at least one or two profiles already available for it. If you're not happy with AutoMKV's built-in settings you can add your own profiles, or settings someone has shared. A Google search for MeGUI profiles should give you a good starting point. Although the profile (XML) format was developed with another application, MeGUI, in mind, it's been adopted by a number of developers, and become a sort of defacto standard for storing encoder settings and using them across a number of programs.

Adding Profiles
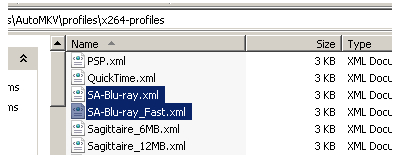
If you have additional profiles that you'd like to use in AutoMKV, simply copy the XML files into the appropriate folder and it will be listed the next time AutoMKV restarts. There are separate folders for x264, XviD, and WMV profiles. Make sure you put yours in the correct list because this determines which encoder they'll be available in AutoMKV.

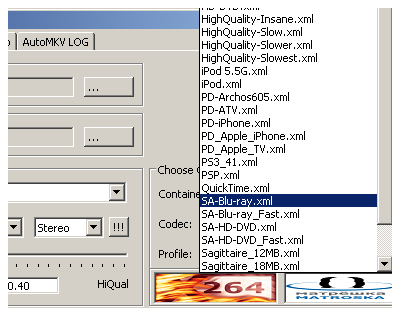
Once AutoMKV is re-started you'll see the additional profile or profiles in the dropdown on the Basic Settings tab.
Advance Profiles Editing Tab
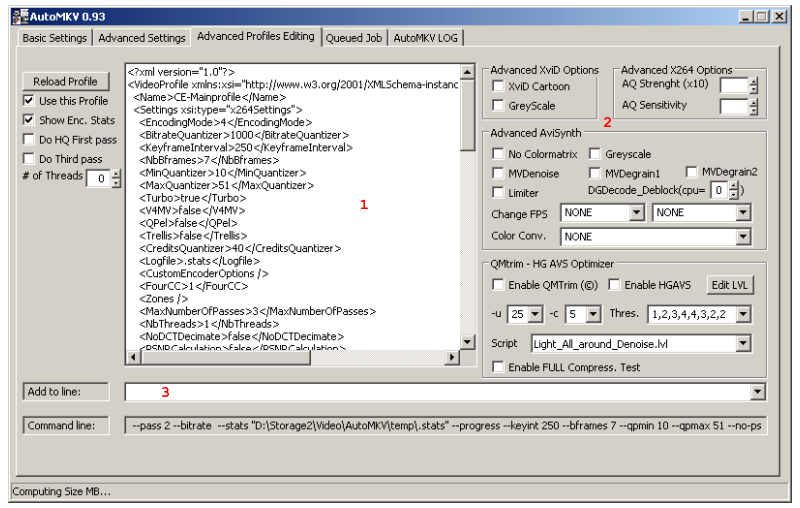
Support for MeGUI-style encoder profiles allows the average user to start using AutoMKV with little or know experience. At the same time, they allow more advanced users to tweak settings in nearly any way imaginable. On the Advance Profiles Editing tab you'll be able to view the currently loaded profile. You can even edit the profile directly and use the checkbox on the left marked Use This Profile to use your new settings. Your changes won't be saved to the original profile, but just used for the current encoding job. If you decide to modify a profile that came with AutoMKV or you downloaded from another source you should make a copy first and edit the copy instead of the original.

1. Profile Editor
You can view and edit the profile directly here. Once you're done making your changes check the Use This Profile box to update the command line. The Reload Profile button will read the original profile and return it to those settings. You can also add a third pass to a multipass encoding job.
If you need to revert back to the profile as originally loaded you can use the Reload Profile button.
2. Advanced Encoder and AviSynth Options
Some advanced settings for XviD, x264, and AviSynth can be selected here. Some are fairly obvious, such as XviD's Cartoon setting for encoding animation or XviD and AviSynth's Greyscale options for black and white video. Other options are used for denoising and changing framerates. If you're not sure what one of these settings does you should do a little research before you try to use it or you could get unexpected results.
3. The Command Line
At the bottom you can view the command that will be generated for encoding your video. Above that you can add your own options directly.
Return To Your GuideIf you came here from another guide, select the appropriate link below to return. Return to Convert MPEG-2 Captures to AVC with AutoMKVReturn to Encoding From DVD to AVC with AutoMKVReturn to Customize x264 Profiles with MeGUI | |
| AutoMKV Installation and Configuration | You are viewing Page 5 of 5 -- Go to page 1 , 2 , 3 , 4 , 5 |
Where to go from herex264 Encoder SettingsOur guide on x264 settings gives examples of some basic options of the x264 encoder, including information on both the command line and MeGUI profiles, as used in AutoMKV. |
Version History
v1.0 2008.03.31 Original version by Rich FiscusTable of Contents
- Introduction
- Installation and Basic Configuration
- Basic Settings
- Advanced Settings
- Advanced Profiles Editing
