With Nero Vision configured the way you want, you're ready to get started editing and encoding. It's best to think of these as two different stepts because the editing step is the same no matter what format you're encoding to, and Nero can encode to formats other than Nero Digital. Since this guide is really about encoding, I won't cover more advanced editing features like filters.
Browse For Media
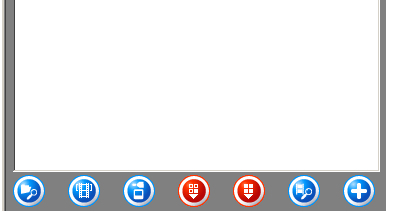
In order to add files to your project, they need to be listed in the Media dialog. Click the round button with a magnifying glass and folder on it and select either Browse or Browse and Add to Project. A file browser window will appear where you can browse to the file you want to add. If you select a VOB file you'll be asked if you want sets of VOBs treated as individual files or as a single file. I recommend always treating them as a single file, because in reality they are. The only exception would be when you're adding a VOB and you only need to keep a portion from the middle of it. Selecting Browse and Add to Project will cause the file to appear under My Media Files and be added to the end of the timeline. If you have separate audio and video files you'll need to make sure to add both to the dialog. Once you have the source file or files you can drag them to the timeline and you're ready to encode.

Encoding
Once you have the source files dragged to the timeline you can encode. I recommend saving first, using the Save button at the bottom of the window. Click the Export button when you have the project saved. On the right side of the Export Video window you'll see the settings to be used. Start by selecting Nero Digital from the dropdown menu at the top. That will give you some generic settings.
Configure Encoder Settings
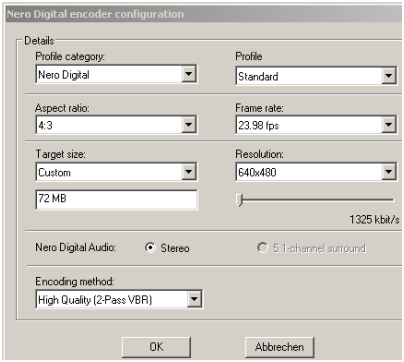
Once you have Nero Digital selected you can select the specific profile and bitrate settings. The first setting to select is the Profile at the top right of the encoder configuration popup. This will determine what options are available in most of the other lists. Next you should select the framerate and resolution based on your source and how you're playing it back. If your playback device is connected to a television it's best to select a resolution that has the same horizontal resolution as your TV. This would be 480 for NTSC or 576 for PAL. The framerate should match your source, although for television playback, once again it needs to match the TV - 29.97fps for NTSC and 25fps for PAL. For a widescreen aspect ratio select 16:9. For fullscreen use 4:3. If you're trying to hit a particular blank disc size you can select the type of disc from the Target size dropdown. You can also select custom to enter your own size. If you want to hit a particular bitrate instead, use the Bitrate slider. Finally, unless you absolutely don't have the time, you should always select High Quality (2 Pass VBR) for Encoding Method. Like almost every encoder, Nero Vision will never give you the same quality from a single pass it does from two.
Start Encoding
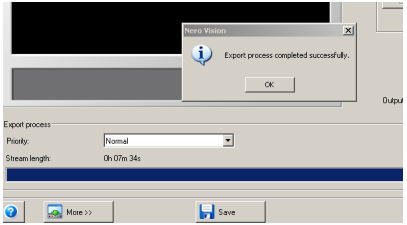
Once you've selected your settings you can start encoding. Click the Export button at the bottom of the window and wait for encoding to finish. The amount of time required will vary greatly, depending on the settings and your computer. If you want to use your computer for other tasks while encoding you'll want to change the encoder's priority in Windows. The priority determines how easy it is for other applications to use your computers CPU while the encoder is running. Lowering it to the lowest possible setting (Very Low). This will generally result in around a 3% - 5% speed reduction. The Priority dropdown is only available while the encoder is running.
