Convert to DVD with VSO ConvertXtoDVD
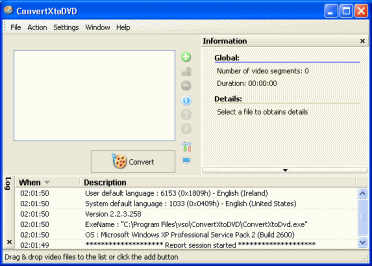 By now you should have downloaded and installed VSO ConvertXtoDVD from this site. If you haven't, then click here to download it.
Once installed, run the program and you will see it looks exactly like the picture beside this text. It is fairly straight forward. To add videos, you need to use the
 button. Once files are opened, you will see editable settings for each file in the blank to the left of the program. To the right there is an information window, and possibly a Video Preview window.
Personally, I don't like the Video Preview window, so I turn it off by clicking Window and de-selecting it. At the end of the program is an event log. Ok, let's not waste time, click the
 button.
Open Files
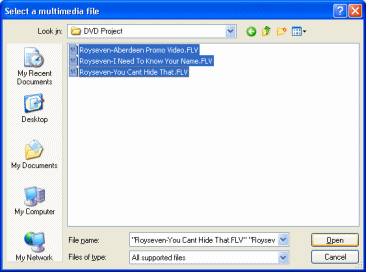 Navigate to the folder you saved all the videos form the Internet to. You can select one and click Open, or if you hold down the CTRL key, you can select many videos to open at once and save some time.
Once you have selected all the videos you want, click Open, and then you should be able to see details on them in ConvertXtoDVD.
Video Details
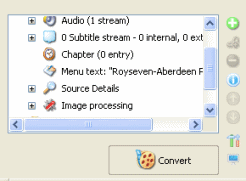 Now you will be able to see some details about the videos you have opened in both the information window (as you select them) and in the project files box. Notice you will also see a Menu there that is automatically called "My DVD".
If you click the + beside the files you will see that you can edit chapters, add subtitles, audio and change the text that will appear on the Menu for the video. VSO ConvertXtoDVD makes a simple menu that has any background image you want to use and has text on the pages (multi-pages if there are a lot of videos).
If you do not see a Menu entry amongst your video files that says Menu - MyDVD --> Do not worry, we will switch on Menu support later.. or switch it off if you only have one video and no need for a menu to select it. For now though, let's name the Menu appropriately.
Rename Menu
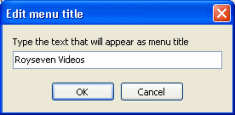 To rename the menu (Default is My DVD), simply double click it and a small window will pop up. Type whatever you want to appear on the Menu to describe what the DVD is as a whole. When that is done, click OK.
ConvertXtoDVD settings
Now we will edit some settings in ConvertXtoDVD that will determine several aspects of the output.
General Settings
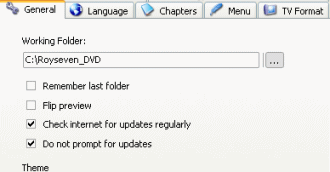 In ConvertXtoDVD, click Settings --> General. These are general settings for ConvertXtoDVD. The only one that is really important here is the "Working Folder". Click the "..." button beside the Working Folder text field and navigate to the folder you want (or you also have the option to create a New Folder inside another.)
My working folder is nice and simple as C:\Royseven_DVD. This means that when the conversion process is finished, all the DVD files will be inside this folder. Set your folder and don't forget to click OK.
Encoding Settings
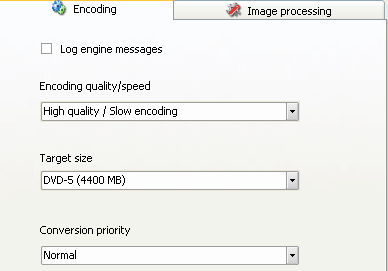 In ConvertXtoDVD, click Settings --> Encoding. Encoding quality/speed lets you decide between low quality, medium quality and high quality. If on high quality, it will take much longer than the lower options, but since your input files are probably lower quality, try the High Quality settings so that it doesn't look considerably worse on DVD.
Next is Target Size. You can choose between DVD-5 (single layer writeable disc) or DVD-9 (dual layer writeable disc). In order to choose DVD-9 you have to have a Dual Layer burner and DVD-R DL media. DVD-5 can hold up to 4.36GB whereas DVD-9 can hold about 8.5GB. You will also see a custom option to enter value in Megabytes . To avoid errors some people like to set their encoding size to 4300MB so that you don't burn right to the very edge of the disc, which is where a lot of defects often are. Conversion priority is all to do with Windows task priority settings. If you are to select highest, make sure you are not running other programs. TimeCritical is likewise, although I don't recommend its use. Most users should keep this at Normal (which will leave most PCs usable during the encoding process). When you are done here, click OK.
TV Format Settings
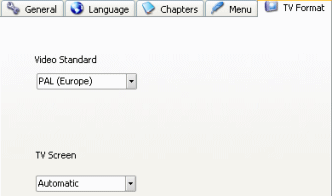 In ConvertXtoDVD, click Settings --> TV Format. TV Format settings will determine two things; your TV standard and whether you want your video to output for a Fullscreen (4:3) or Widescreen (16:9) television.
NTSC is standard in the United States and Asia, PAL is standard in Europe and Australia. If you leave the setting on Automatic, then the program will determine which setting it should use, but if you know it yourself (where do you live?), then select the option.
TV Screen is best kept on Automatic setting as the program will try to output the video with an aspect ratio that suits it the most. The make up the difference in framerates (if any), the program will duplicate frames to compensate. When you are done here, click OK.
Menu Settings
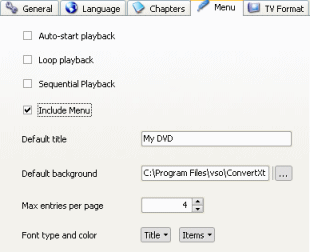 In ConvertXtoDVD, click Settings --> Menu. If you want / need a menu, ConvertXtoDVD will create a basic but effective menu. Auto-start playback will mean that the first video will immediately begin playing when the DVD is inserted into a player, bypassing the Menu. Loop playback will continue to play videos in a loop until you press Menu and Sequential playback will play the videos out until the end and return to Menu.
If you want a Menu, obviously you have to have Include Menu selected here. The Default title is simply whatever you want the default title to be every time you use ConvertXtoDVD. Default background let's you change the default background picture for your menu (make sure its Large!). Max entries per page will determine how many videos can be on each Menu page, 4 is a reasonable setting. Font type and color will allow you to select a color for the text on the resulting Menu and also a font. When you are done here, click OK.
Chapters Settings
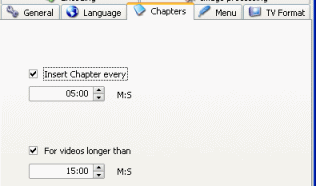 In ConvertXtoDVD, click Settings --> Chapters. If you have a long video, you may want to add chapters so you can easily skim through using the remote control whenever you want to. While you can, as we saw before, insert a chapter anywhere on the video by just specifying at what time of the video, here is where you can have automatic chapters set for you.
This will allow us to set some delays between chapters and the minimum length a video has to be before the automatic selection is made. If Insert Chapter Every is selected, then the given amount of minutes and seconds will be the delay between each chapter right from the beginning of the video (00:00).
For videos longer than can be selected to set a minimum length a video has to be before the automatic selection comes into affect. For example it would be pointless having an 8 minute video with one chapter at 05:00. This comes in particularly handy when you have multiple videos in your list. When you are done here, click OK
Burning Settings
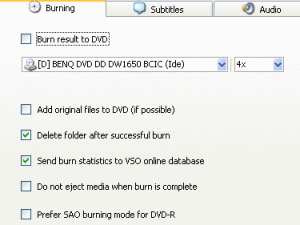 In ConvertXtoDVD, click Settings --> Burning. As i mentioned earlier, ConvertXtoDVD can now burn your output folder for you. Firstly you have the option to Burn result to DVD . If selected, when the encoding process is finished, the burning will start automatically.
I prefer, and recommend in this case particularly, to keep Burn result to DVD unselected. This will allow you to play the DVD files and check them before burning them and maybe wasting a disc.Next you have to select your DVD burner drive and speed . If you leave it at Max it should be ok, but some people prefer to burn at speeds they know give the best results with their drive.
Add original files to DVD (if possible) is a selection that will literally create an ORIGINAL folder on your DVD. Inside this folder will be copies of your source file(s). This is not necessary but it can be useful if you would like to keep the source also as with all encoding processes, quality loss is inevitable. Obviously if you have a lot of files to encode and there is no space on the DVD for original files, ConvertXtoDVD won't sacrifice quality to add the original files, it will simply leave them out.
Delete folder after successful burn is self explanatory. It's useful if you are working with limited HDD space. Send burn statistics to VSO online database is an option you can select if you would like to help VSO software, although it is unnecessary and doesn't affect the burning process. When you are done here, click OK
