Begin Conversion to DVD
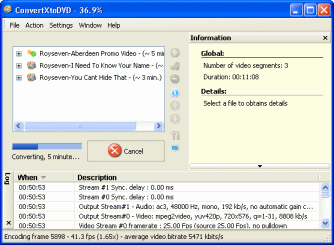 The amount of time the conversion process will take is based on a lot of factors, how long are the videos? how many videos? how fast is your computer? how busy is your computer? Generally though, as encoding software goes, ConvertXtoDVD is quite fast. You will see an estimate of how long it will take after a while (beside the Cancel button).
 When it is finished, you will get an Operation Complete notice (or it will begin burning now if you had set it to do so.)
Check output files
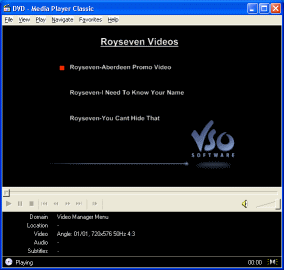 It's always a good idea to determine whether or not a disc is worth burning to DVD. If you do not know how to play back DVD files from your HDD, then read the following guide...
How to play VOB / IFO / BUP files?
If you have determined that the DVD is worth burning and there has been no errors in the process, then it's time to burn it to DVD. The files will be inside a VIDEO_TS folder in the directory you set in General Settings.
Burning with ConvertXtoDVD
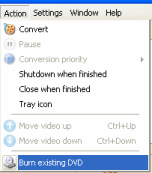 VSO ConvertXtoDVD can now burn the DVD (or any DVD folder) to a re-writable disc using a compatible burner now. In order to burn, go back to ConvertXtoDVD, click Action --> Burn Existing DVD.
Select Folder
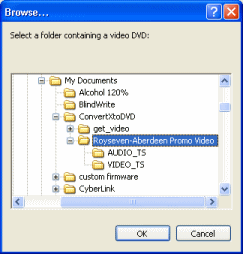 You will now be prompted to select the folder that needs to be burned. This folder was set by you earlier in General settings. Look at the picture I have provided. Select the folder "with" the VIDEO_TS and AUDIO_TS folders "inside" it, just as I have in the picture, and click OK.
 Burning Process
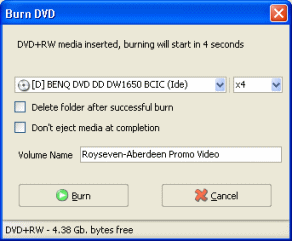 As you can see you once again have the option to select the proper burner. You can select the speed at which you will burn (speed should automatically be selected based on the maximum write speed of your media). Delete folder after successful burn does exactly as it says, and should be selected if you are running on low disk space. The Volume Name of the DVD can be set to whatever you desire.
The burning will automatically begin a number of seconds after you insert blank media but you can also click Burn to start it quicker.
Finally
Hopefully this guide will have worked out for you and you will be able to repeat this process over and over again on your own from now on. If you encounter any problems, please visit our Discussion Forums and seek help there.
Version History
v1.0, First version published by Dela (31st July, 2007
